
Low angle view of floating X Wing under lifting coil - This model was one of two high-end collectible products shown (with other concepts) to a film production company, The other collectible item I worked on was R2D2, also in this set.
The idea behind this product was to use an advanced electromagnetic levitation system to suspend a scale model of an X Wing fighter in a "force field" at a Rebel repair base.
The base was designed and detailed to look like an integral part of the Star Wars universe. Sadly, the models were lost years ago.

Rebel Repair Base--force field support arm - The force field support arm was originally designed to use a smaller coil, but problems with delivery of that unit forced the manufacturer to send us a much larger coil at the very, very last minute. We were able to acommodate that coil, but we came very close to having no lifting coil--and no model--at all.
The only good result was that the more powerful coil gave us another inch of distance between it and the X Wing
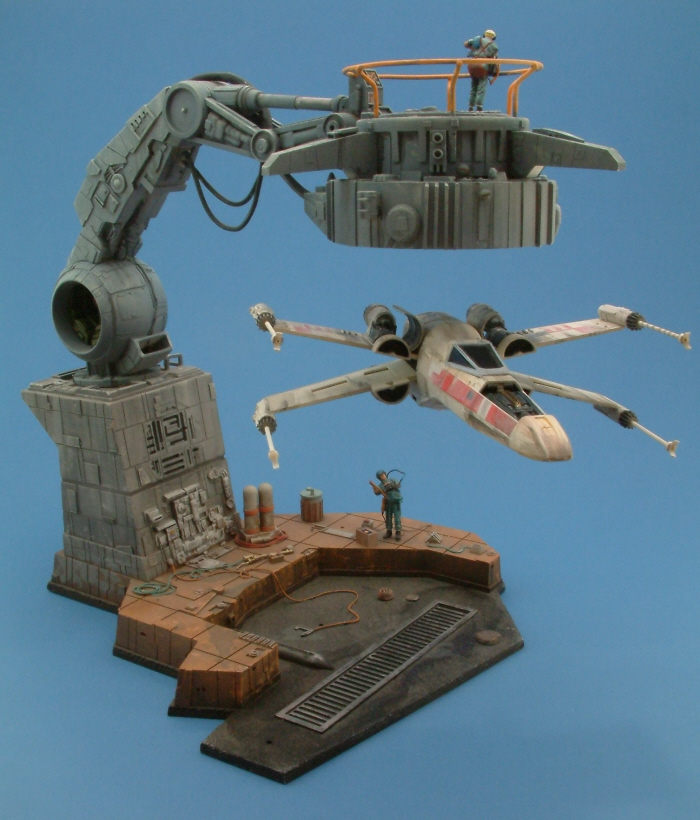
Rebel Repair Base with Floating X Wing in magnetic force field - The X Wing model has been placed under the lifting coil of the force field arm, and is floating free in this photo.
I directed the team of designers and modelmakers that built this model in 3 weeks; I sourced and installed the lifting coil and electronics, and created a special soundtrack that would play when the X Wing was placed in the force field.
I was responsible for the design, final construction, and operation of this model as well as the R2D2 at the presentation.
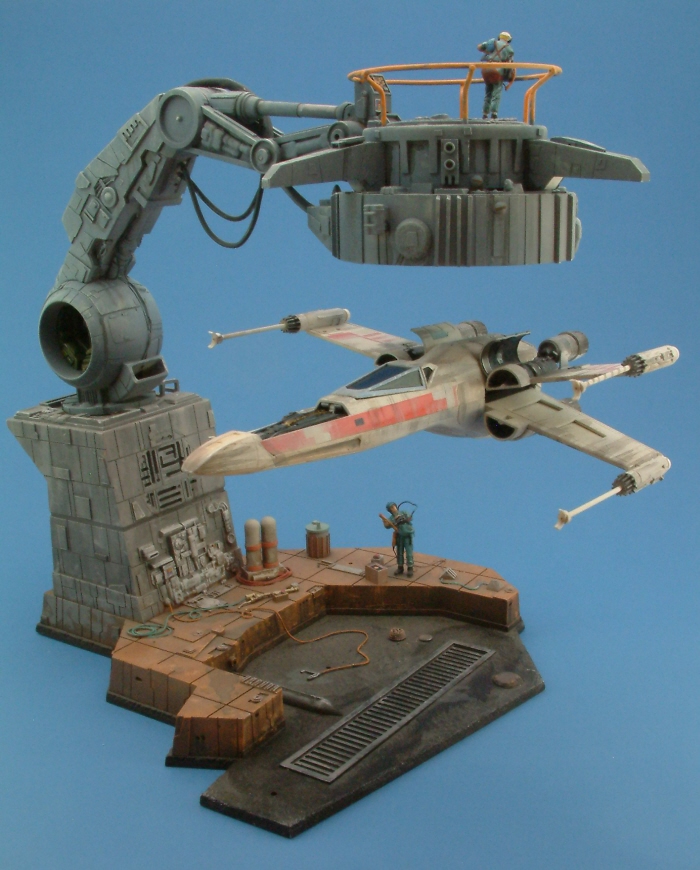
Rebel Repair Base with Floating X Wing in magnetic force field - The X Wing model would float indefinitely in the magnetic field, as long as power to the levitation control electronics was not interrupted.
The levitation system used an advanced (and very expensive) commercially available electromagnetic coil and permanent magnet combination, not an optically-based infrared proximity system found in inexpensive products such as floating globes and similar items. This meant that you could pass your hand between the lifting coil and the X Wing--a great demo!

Rebel Repair Base with Floating X Wing spinning in place - The X Wing would spin for minutes in the magnetic force field, before slowly coming to a stop. My understanding was that the company that supplied the levitation system to me had a coil that would slowly spin the object in the magnetic field, but we had no time to investigate it. I was told that this system was used to levitate the Infiniti logo at some of their dealerships.
The X Wing model was made from a kitbashed MPC plastic model kit, chopped and modified to make it smaller and lighter.

Rebel Repair Base with floating X Wing - This photo shows the distance between the lifting coil and the X Wing to good effect.
There are extremely powerful magnets in both the lifting coil and the X Wing. It took a good deal of practice for me to be able to place the X WIng in just the right spot for the control electronics to sense it and lock on to it, without having the X Wing snap up hard against the underside of the coil.
The show was closed with the presentation of this model, which worked perfectly.
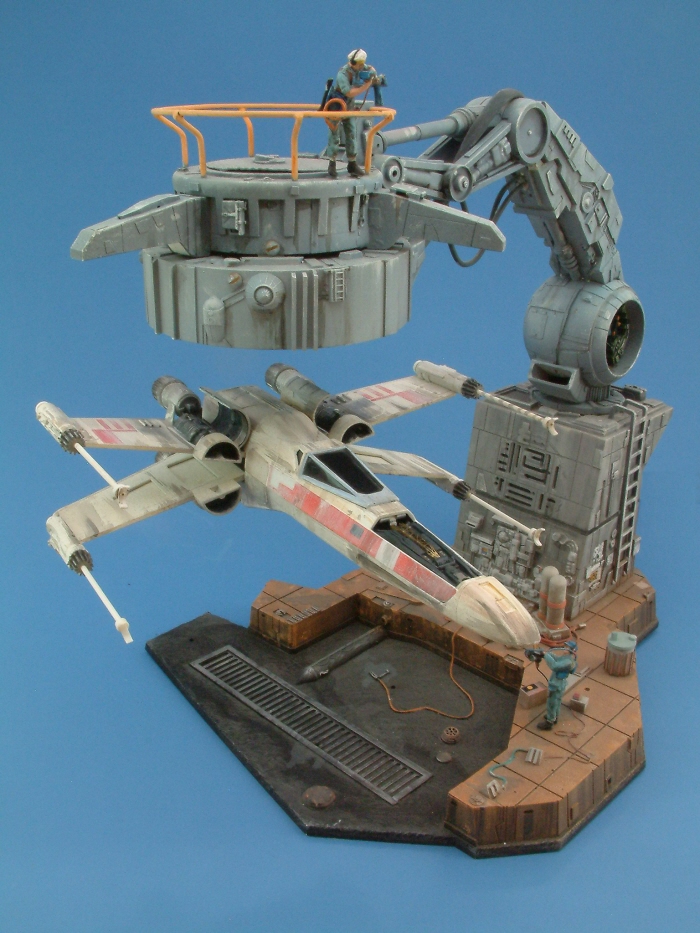
Rebel Repair Base with Floating X Wing--left side view - A view from another angle. The X Wing was designed to fold its wings flat and extend its landing gear while floating in the force field, and I designed and built the animation mechanisms for this function.
I also planned to install a laser diode module and fiber optics to the gun tips. The laser would fire by IR remote control, like the wing cycling mechanism.
Unfortunately, there wasn't time to fully install the items before the presentation, and they were lost in shipping afterwards.

X Wing close up - The X Wing model had a number of opening access panels and hatches, supporting the idea that it was at the repair base for maintenance. In this photo, the two top engine pods are open, showing the engines inside. The "hood" forward of the cockpit is also open.

Force Field Arm operator detail - Dave Wolfram, who designed and built much of the base for me, was also an expert on detail and finishing techniques.
An example--the operator of the force field support arm is sitting here, in his control cab at the base of the arm, with all of his equipment around him. The figures were made by heavily modifing Tamiya plastic figurines that came with their model kits.
Most of the cabling and piping is made of different thicknesses of solder, shaped, draped, and painted in various colors.

Force Field Arm lifting coil detail - A photo of the lifting coil at the end of the arm. Note the larger size of the new coil housing, as compared to the original. The arms were to use LEDs that would create a "force field" light effect.
The details on the model really support the concept that it's a no-nonsense, industrial installation that just happens to be able to hang a multi-ton starfighter in a force field for routine maintenance.
Considering we had only three weeks to do all this, I'm very pleased with the outcome.

R2D2 with 8/23 channel radio control system - This was a fully functional R2D2 model, built in 3 weeks by a team of designers and modelmakers under my direction. It was an example of a high-end collectible, and was only half the size of the movie version of R2D2.
I designed the animation mechanisms and had the internal structure and external body built to my design and size specs. I then acquired and/or built and installed the electronic systems and animation mechs, and installed the external body panels around the internal structure.

R2D2 with center foot retracted - The model had, among other things, the capablilty to extend and retract the center foot; the model could transition from two to three foot mode and back on command. Apparently none of the R2D2 robotic props built for the films could both drive/maneuver and switch between two and three foot support on the fly.
This model was built as part of a large presentation to a film production company in an attempt to acquire a product license for upcoming films.

Center foot deploying - The center foot and its deploy/retract mechanism took up a great deal of internal space, but it was still possible for me to design all of the desired features into the model. A special channel extender was installed to give the radio control system a total of 23 channels (7 proportional, and 16 on/off switched relays used to play sounds).
The model was operated by me during the presentation to the production company at a ranch near San Francisco; it was the show opener.

Transitioning from two to three lfoot mode - Animated features of the model included a 360 degree controllable rotating head with its own power supply (no power cables to twist), with internal lights and animated red/blue "heartbeat" indicator. Other features were a deployable "data link" arm with a laser pointer, another deployable arm, a twin motor drive system identical to the movie props, and 12 selectable R2D2 sound effects.
The model worked perfectly at the presentation, and I managed to not drive it off the table. Whew!

Transition completed - The R2D2 model was driven by a pair of quarter-scale servos, one in each foot of the side arms. They were modified to spin continuously, and each had a drive wheel with a large O-ring. A differential mixer let the servos operate from a single stick.
I was told that the R2D2 film props did not have the capabilities that were built into this model, as each set of them could only do one or two things at most. In contrast, this model had at least six completely different functions.

Doors open - In this photo, the laser "data link" arm is deployed, and the main access hatch is open, allowing a glimpse into the extremely crowded interior space.
The model was powered by a 6V rechargeable Ni-Cad D cell pack, mounted inside the modules next to the ankles. This gave the model a low center of gravity, and very good stability. A smaller 500 mAhr 4.8 volt pack was installed in the dome to run the lights and "heartbeat" indicator. The model would run for well over 2 hours on a full charge.

Animated ThunderCats figure - This is an animated ThunderCats figure with 8 channels of control for its operating features. There were 6 proportional servos for waist turn, head turn, right and left arm raise/lower, right wrist rotate, and left claw firing. Additionally, 2 digital channels operated lghts in the sword, eyes, and medallions.
The animations were run by an 8 channel animation control board (ACB) with sound. I installed the board and programmed the figure's moves for this project, but didn't build the model.

ThunderCats figure, lights on - This photo shows the internal lighting system in the figure switched on.
While I did not build the model, I was asked to animate it as a special project. I specified and installed the 8 channel ACB and all internal electronic systems to enable the figure to move and project sound.
I then programmed all of the motions and lighting effects to synchronize with the soundtrack, which had been recorded and was loaded into the ACB. The ACB is an off-the-shelf unit, as are the internal servos.

Firing claw in ready position - The left hand had an integral claw that could be fired on command; it would travel about 10 feet. Aiming was done by slewing the upper body with the waist drive servo, and adjusting elevation with the left arm raise/lower servo.

Firing claw, showing projectile shape - The firing claw is shown here partially clear of its recessed holder.

ThunderCats animated figure, left side - The base of the figure contained the ACB, the speaker and audio amplifier for the sound file recorded into the ACB's sound chip, and the rechargable battery pack that supplied power to the various systems.
One of the advantages of using an ACB for an application like this is that each performance is identical, and is started with the push of a button. I've puppeted many radio-controlled projects, and I know that no two performances are ever exactly the same, no matter how skilled you are.

ThunderCats animated figure, right side - The sword has internal LEDs that light up the designs etched on its surface. The sword and figure have separate lighting systems that are each operated by their own digital ACB channel.
gLike
Special Animation Projects