
As a part of my work with HBI I was tasked with designing graphics for seamless, tubular knit shapewear and devising a printing procedure for them. These could not be printed as a normal garment because they could not be fitted over a conventional printing pallet. They are form-fitting, allow stretch and then revert to their original shape. If they are stretched while they are printed, the print is distorted. Since they are a knitted, tubular construction, they can not be printed prior to being assembled. Working with my printers, we devised a printing method. Additionally, we used a spandisol additive to allow the print to stretch without cracking when the garment is worn. This resulted in an entire business segment being moved from sourced production to our internal HBI facilities. I also worked on a solution for garments that require molding, but we determined that it is best to avoid a decoration directly on the areas to be molded.
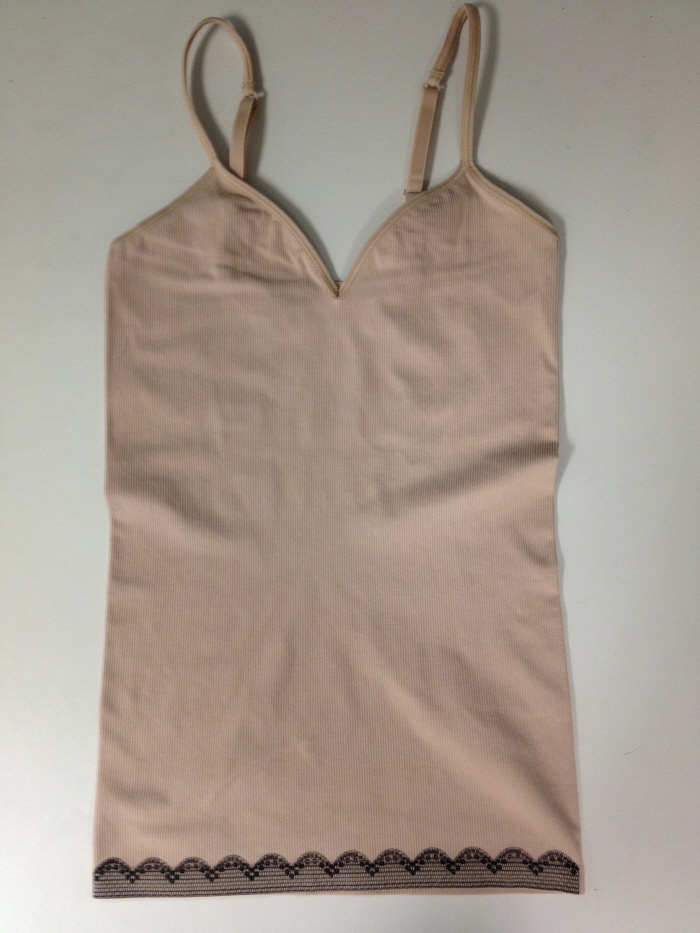
Image of the ribbed shapewear tank by itself. It's tubular knit, so I created a design that would work well for an Innerwear product, the faux lace and we developed a process for being able to print these in a conventional print facility, as well as made sure the ink had some elasticity to it.
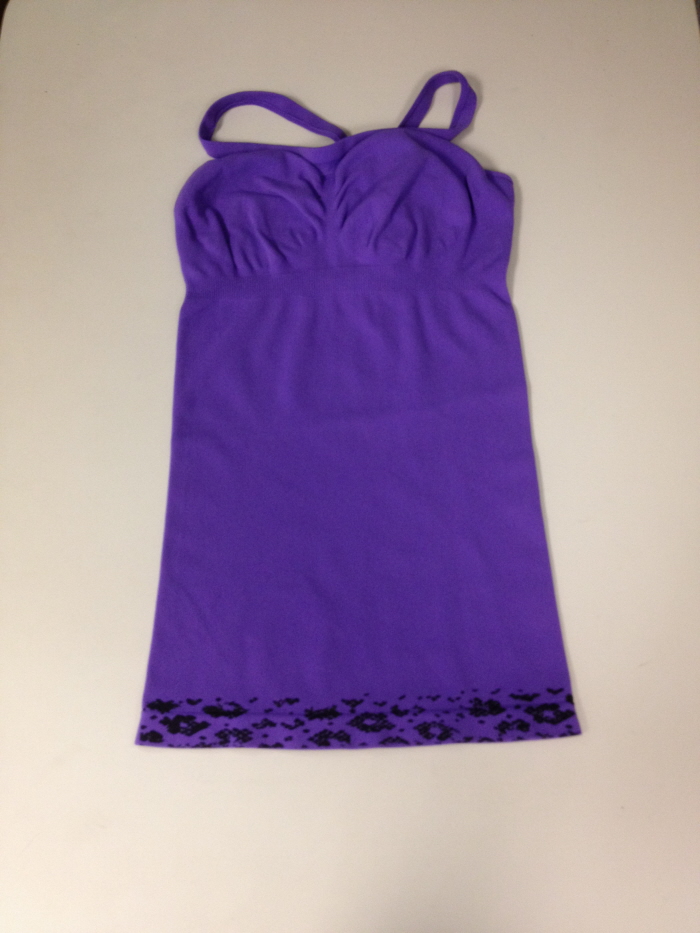
Another garment with the same problem, it being tubular knit. This is a shapewear cami. The process of printing and ink formula remained the same, but since this garment leans more toward the athletic and less toward Innerwear, I designed a bolder repeat print pattern.
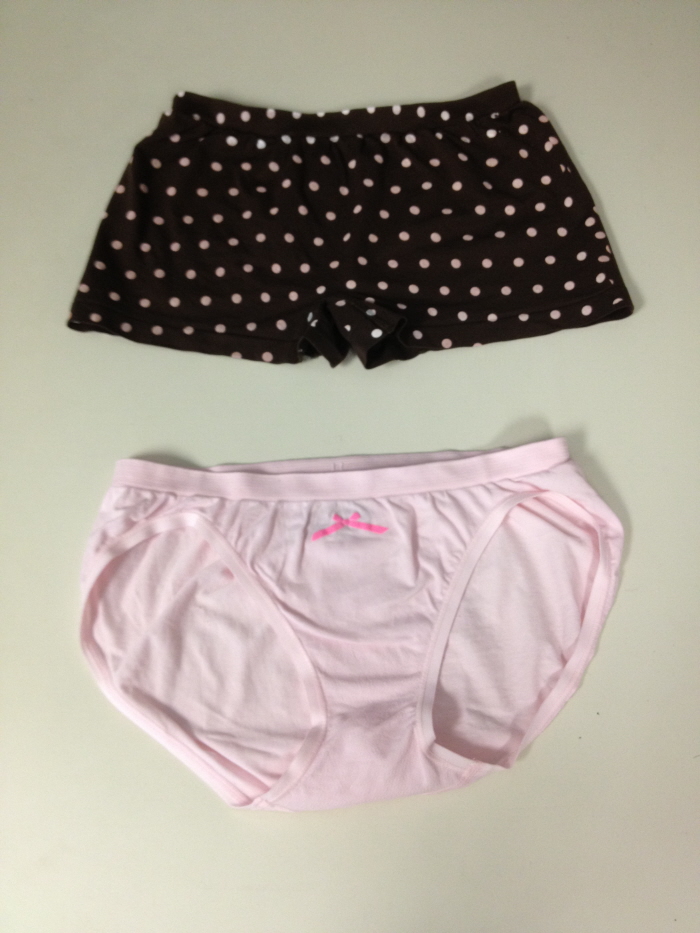
All-over and spot prints on seamless intimates. Developed for HBI using that same process and ink formulation for constructions that can't easily be decorated as cut pieces and also have stretch. The second piece is a spot print, that has a softness and texture you can feel. It was developed to try to emulate a real ribbon, or other type of embellishment, but at a much lower cost.

Faux Stitches - This was one of the first specialty ink techniques I developed for HBI. It's actually a 3-dimensional print, with texture, but it looks like stitching and applique.

Disney Patch and Autograph - This utilizes that previous technique and was submitted as an idea for a zip hood program for Disney Parks. The left chest area would feature an icon representing each character, like a honey pot for Pooh, printed as a patch with a texture like knitted stitches, with a running stitch and white border around the edge, as well as an off-set shadow to further the illusion. It’s printed with puff ink and has actual 3-dimensional height and texture. The icons each have an initial for the character with a stitch effect that would make it appear embroidered into the patch. The back of the garment features the character with its autograph. I chose to incorporate the autograph because one of the experiences that’s really specific to Disney Parks is getting to meet the characters and gather their autographs. Taking home this hoodie would not be just another souvenir, but a reminder of time spent in the park.

Designed for the Hanes Girls summer line, we wanted to do something kind of unique. Merchandising had the idea for fireflies in a jar, so I created a design and did two color variants for blue and white garments. We made it unique by mixing glow in the dark with crystallina glitter, which was applied on top of all the green in the design.

Mixed Flock Technique developed for HBI. We wanted to do something that would really be different, so we came up with the idea of mixing flock with different things. We also tried mixing different colors of flock in different ratios, which resulted in some cool heather effects, like this one, as well as printing on top of flock.

Textured Foil w/ Height developed for HBI. We wanted to make our foil extra special, so we thought about using it with different specialty bases. This one gives it it some height, which adds a 3-dimensional dynamic to it, almost like embossing.

Brushed Foil developed for HBI. Another foil experiment, we used different specialty bases under the foil, but instead of using a traditional squeegee, we used a brush attachment.

Wet Glitter Technique developed for HBI. Our original wet glitter was problematic and looked really gummy, which Design & Merchandising did not like. Their solution was to solely use dry glitter, but that was not cost-effective and caused havoc during production. So, I worked closely with Wilflex/PolyOne reps and our production facility in Honduras to improve our wet glitter, so it actually had the appearance of dry glitter. This improved our production flow, as well as our costing, but also allowed us to use more than 1 color of glitter on the same design, which you can't do with dry glitter.
gLike
Product Development & Screen Print R&D
Product development, as well as individual specific specialty screen print techniques.