VC130_Week1_Exercise1 - Using a rectangular or elliptical marquee, delete multiple parts of an image in an interesting manner.
VC130_Week1_Exercise2 - Using a rectangular or elliptical marquee, isolate part of the image, copy it, paste it, and then use the Move Tool to move the duplicate to another part of the image such that the resulting image is more interesting to look at than the original
VC130_Week1_Exercise3 - Using a rectangular or elliptical marquee, isolate part of the image, use the transform tool and scale the selection 200%. Copy and paste the scaled selection then move it to another part of the image such that the resulting image is more interesting to look at than the original.
VC130_Week1_Exercise4 - Using an elliptical marquee, rotate one or more parts of an image in an interesting manner.
VC130_Week1_Exercise5 - Using a rectangular or elliptical marquee, isolate part of the image then go to the Filter pull-down menu and experiment with various Artistic, Brush and Distort filters.
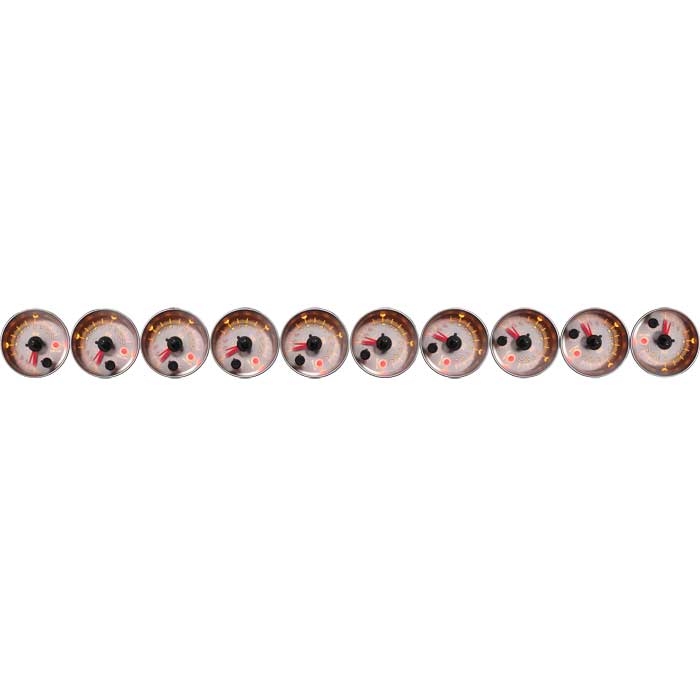
VC130_Week1_Exercise6 - Using an elliptical (circular) selection, select an interesting part of an image and copy it to the clipboard. Paste the image on the clipboard into the middle of the composition. Use the Move Tool to move the image to the left side of the composition. When you have positioned the first image, paste another copy of the image and position it next to the first. Repeat this until you have a chain of ten images in a row.
VC130_Week1_Exercise7 - In this exercise you will use a rectangular or elliptical (circular) marquee to select an interesting part of the image, and then use the Image > Crop command to remove all parts of the image around it. Experiment with different shapes of marquees and different placements of the selections. The end result should be a cropping that is more interesting to look at than the original image.
VC130_Week1_Exercise7 Original - Original photo for exercise 7
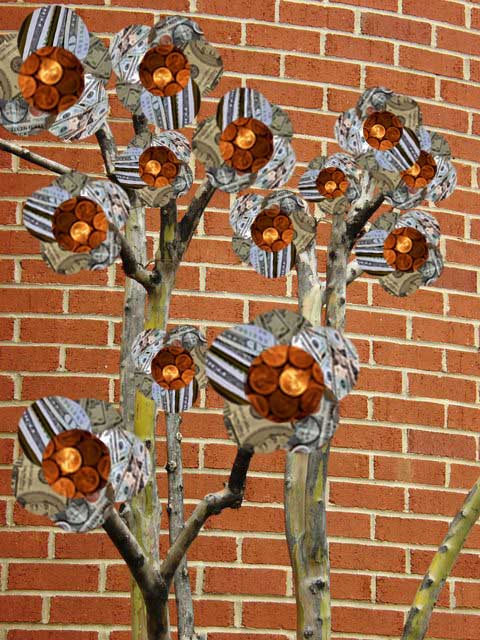
VC130_Week1_Exercise8 - Using the provided image called tree.jpg Your creative task is to add square and circular selections from other images with interesting colors and textures as "ornaments" to this tree. To add variety, make the ornaments different sizes and rotation values. Use overlapping to create a sense of depth. Create clusters of various images (like bunches of grapes). It should look like the images are clustered at the end of the bare branches.
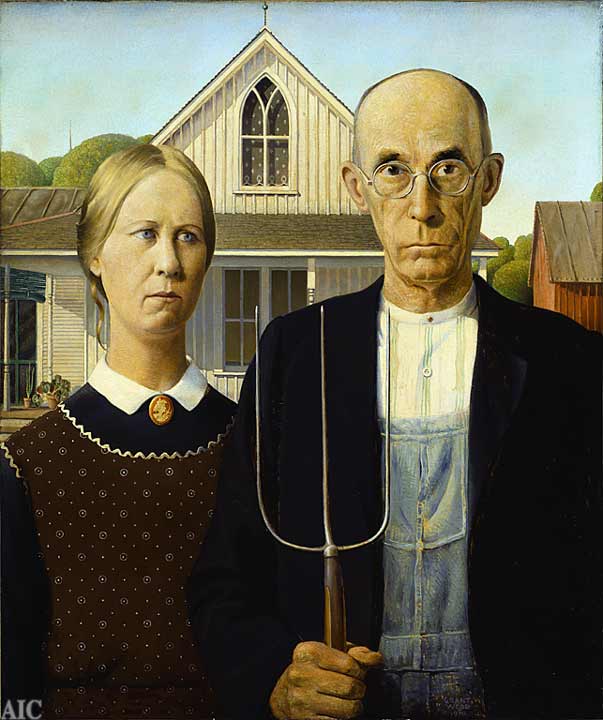
Actual Painting
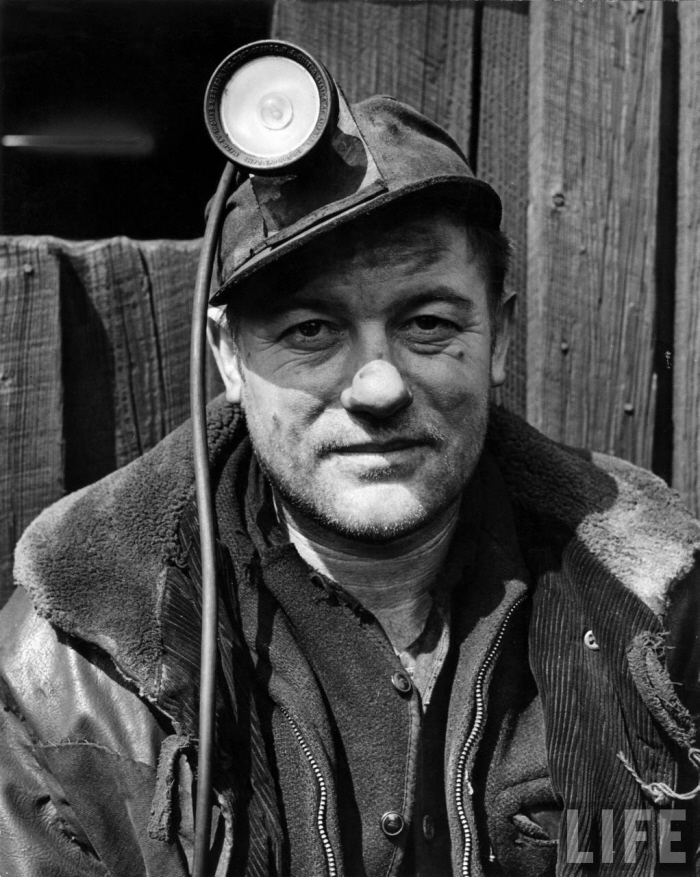
Miner Original
VC130_Week3_Exercise2 - In this exercise you will use the Healing Brush tool to remove the eye wrinkles, bags under eyes and blemishes from the photo of the coal miner shown below. You can also touch up his dirty forehead and nose as well. As with the previous exercise show the before and after photos in your Coroflot. If you want to go all out, apply all the techniques discussed in this tutorial.
VC130_Week4_Exercise1 -
In this exercise you will utilize any of the selection techniques discussed thus far to extract a person from one photograph, and then seamlessly integrate it into another photo using layer masking. You are trying to suspend disbelief as much as possible such that the viewer believes it is plausible that the photo is authentic (though realism isn't necessary). You MUST utilize layer masking in this exercise, therefore you will have to composite a photo int the intermediate zone of the image.
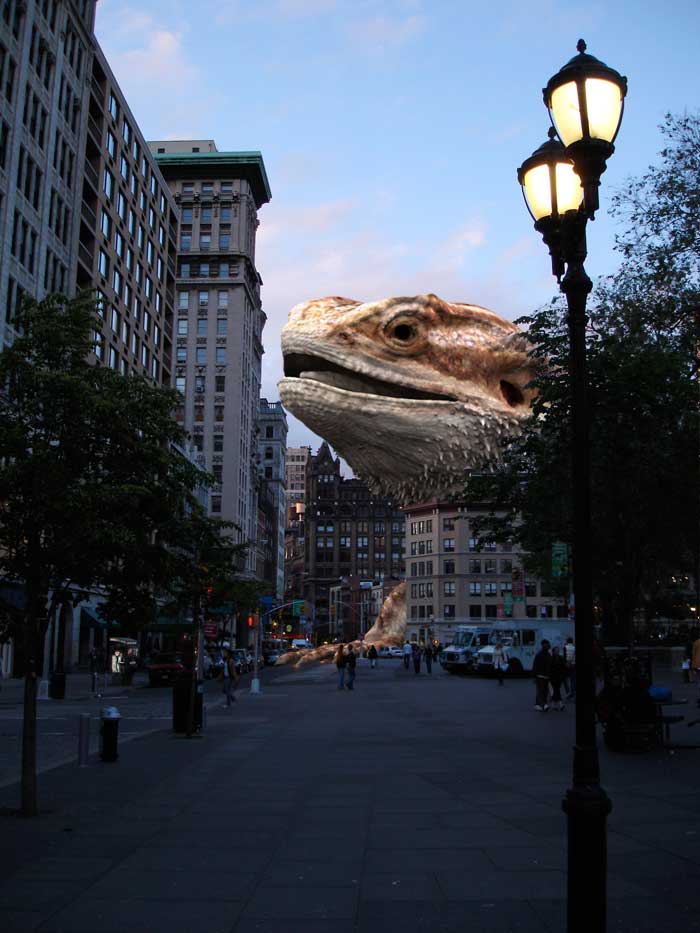
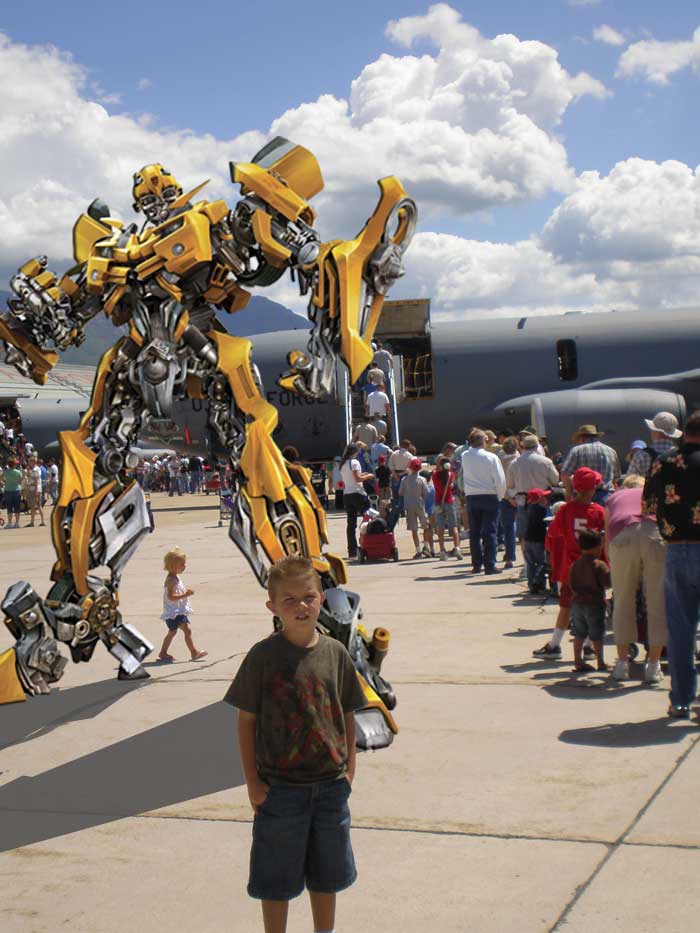
VC130_Week4_Exercise2 - This exercise is identical to Lab 1 except this time you will be following a different theme. In this exercise, you will be taking a small animal and intergrating it into another photo such that the animal now looks like a Godzilla-sized monster!
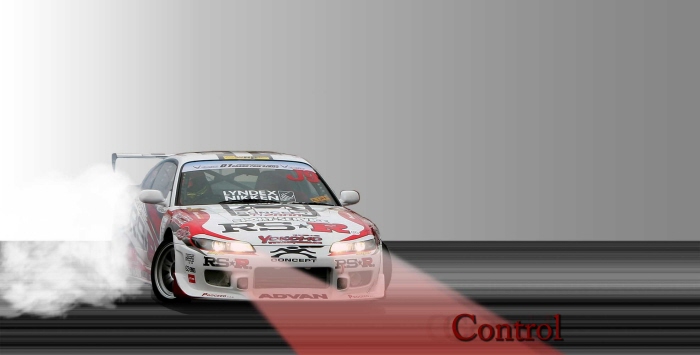
Design a sports poster. The poster needs to imply a sense of motion associated with the chosen sport.

In this exercise you will create a 300 x 300 (pixels) image of a single color. The color you select should be based on a color that can be associated with an everyday or commonplace object that evokes a common color in everyone's mind.

In this exercise you will create a 300x300 (pixels) image of a 2-color complementary pair. Each color will fill 1/2 of the square divided vertically. Do not tint, shade or tone the hues. To establish an accurate subdivision of space use the "Fixed Size" style option in the Marque Select Tool, or drag a guide to the middle of the composition while holding shift to constrain it. Use ColorImpact to create this harmony.

In this exercise you will create a 300x300 (pixels) image of a 3-color triadic harmony. Instead of dividing the space equally (like Exercise 2) you will fill three circular selections with each color. The circles should be overlapped in such a manner that none of the background color can be seen in the final image. Apply an equal amount of tinting (white) to each color. Use ColorImpact to create this harmony.

Find a five color palette from the Top Palette section of COLOURlovers.com that you find appealing. Recreate this palette as a 750x300 (pixels) image with the colors spaced equally.

Find a photograph from morguefile.com that is comprised of three colors that interest you. A good image will be comprised of one dominant, one subdominant and one subordinate color. Fill in the remaining half of the canvas with a linear gradient that includes all three colors. Adjust the gradient stops in such a manner that the spacing is equivalent to the proportions of each color in the photo.
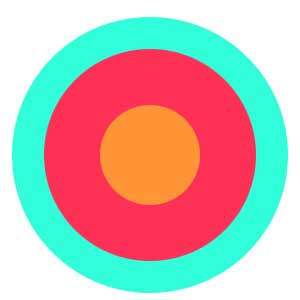
In this exercise you will create a 300 x 300 (pixels) image comprised of a 3-color split-compliment harmony. The composition will be comprised of three concentric (all share the same center) circles. The circles should all be centered at the middle of the composition.
In this exercise you will create a 300 x 300 (pixels) image comprised of a 4-color tetradic (rectangular) harmony. The composition will be comprised of four of the same custom shape created with the Shapes Tool (U). NOTE: You are not limited to the default shapes. Different shape libraries can be loaded from the flyout menu. Each of the four identical shapes should vary in size. Apply an equal amount of shading (black) to each color. Use ColorImpact to create this harmony.
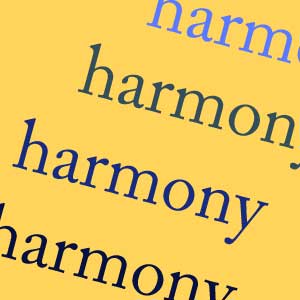
In this exercise you will create a 300 x 300 (pixels) image comprised of a 4-color monochromatic harmony (harmony comprised of a single hue). The composition will be comprised of a random repetition of the word "harmony." Each copy of the word will be the same size, with the same font, with the only variation being to color. Your harmony should be comprised of equal amounts of tinting, shading, or toning (but don't mix tints with tones or shades). harmony.

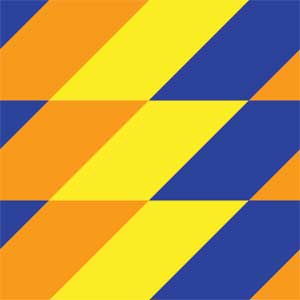
In this exercise you will create a tileable pattern in both illustrator and then cutting it out for use in Photoshop.
Mac vs. PC - Worth1000.com posts weekly challenges for Photoshop enthusiasts. Contests from beginner to advanced last a week and the winners are voted up and posted at the conclusion of the project. This week you will be completing one challenge from the archive of past projects

VC100_Final_Exercise1 - This is a magazine article lead in. This was meant to be the final project for my photoshop class but I realized the assignment stated that it needed to be about food. I converted this idea to a play bill for Romeo & Juliet
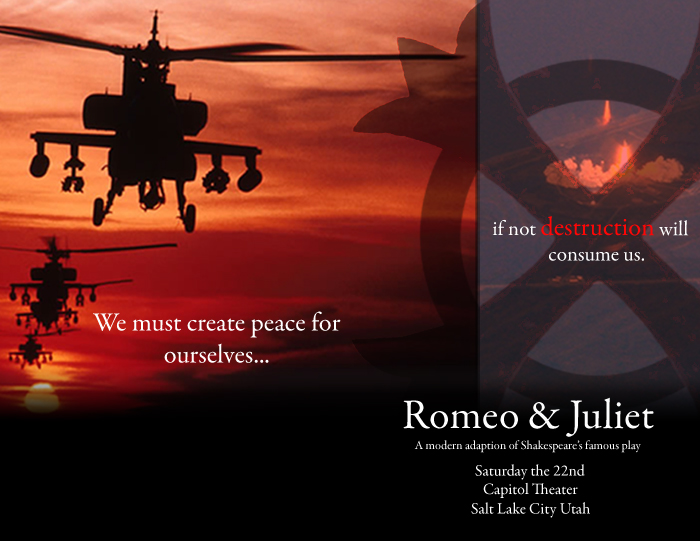
VC100_Final_Exercise2 - This is my final project for photoshop class. It is a playbill for Romeo & Juliet. It is designed as the left is the front cover and the back is the right side. It is meant to open left to right vs the standard right to left as a symbol that people need to change the way they think about things.
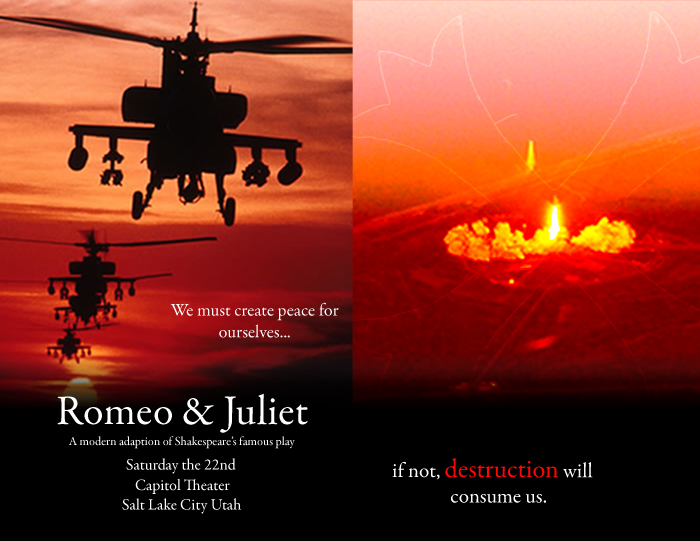
This is my final project for photoshop class. It is a playbill for Romeo & Juliet. It is designed as the left is the front cover and the back is the right side.
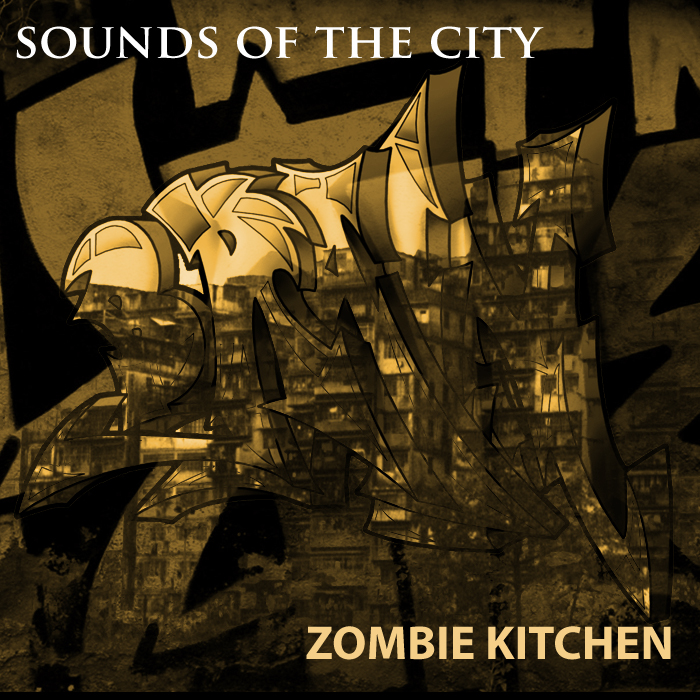
The anti-relaxation cd. Photos from google images - In this exercise you will create a CD cover for a ficticious band. The CD cover must incorporate the following:
* A background image that has been sepia-toned. Be sure to credit the photographer on your coroflot. There should be a margin and border around this image. The margin is created by increasing the canvas size (Image > Canvas Size).
* Album title
* Band title
* Parts of at least two other images merged into the background image via layer blending
gLike
Photoshop