
December 1986. My sister and I's very first ride on our brand new bikes.

December 2013. Same bike, same exact location 27 years later

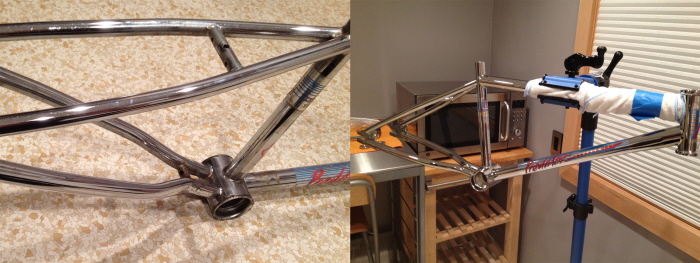
Purchased Nov. 2011 (frame/ fork/ handlebars/ seat post/ seat post clamp) Located it less than 10 miles from my house. Biggest mistake was not buying a complete bike...took over a year to source all the remaining OE parts. Overall the condition was fairly good on the the original chrome. With a possible OA bath (Oxalic Acid) and some #0000 steel wool with Blue Magic chrome polish, it would have cleaned up pretty well. However given the importance of this bike to me, I opted to have it completely rechromed

ready to be sent out for chrome plating. (sourced: OE front sprocket/ OE crank/ OE stem/ handlebar clamp/ OE wheels. All parts were sent to Chromemasters
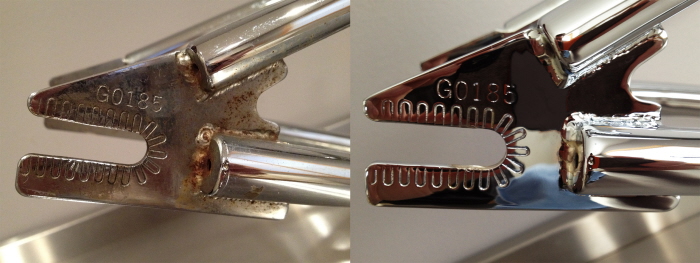
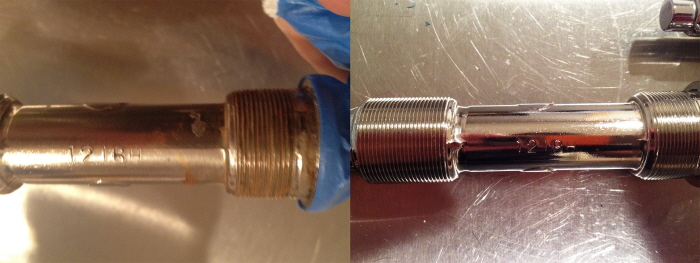
Date stamp dropout before/ after chrome plating. Manufactured date of January 1985

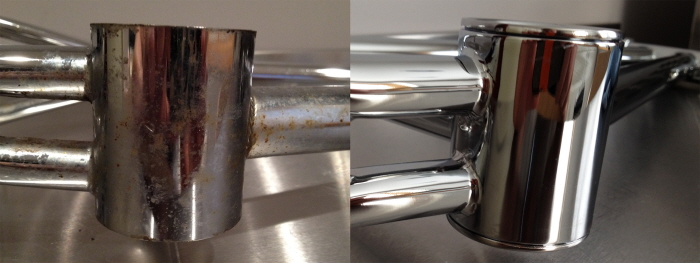
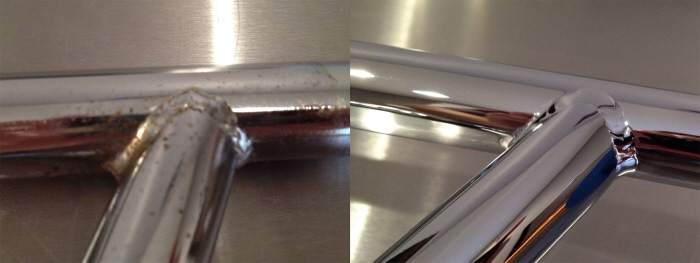
chainstay/ hub before/ after chrome plating
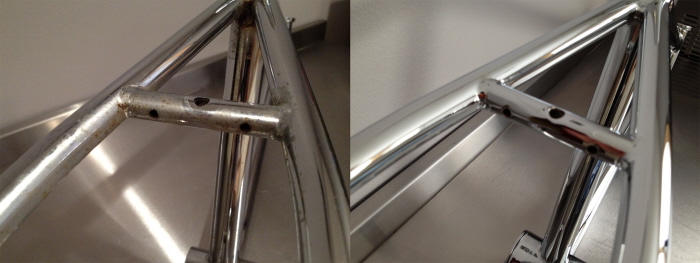
Seatstay/ rear claiper mount before/ after chrome plating
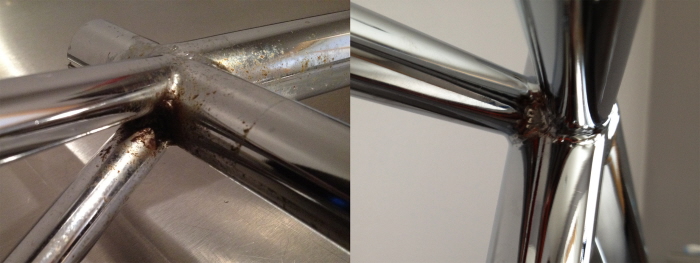
Seat post seatstay before/ after chrome plating
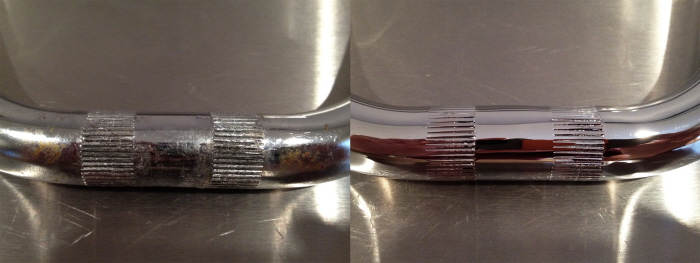
hub before/ after chrome plating. Also mirror polished bearing cups
lower bracket hardware before/ after hand sanding/ mirror polishing
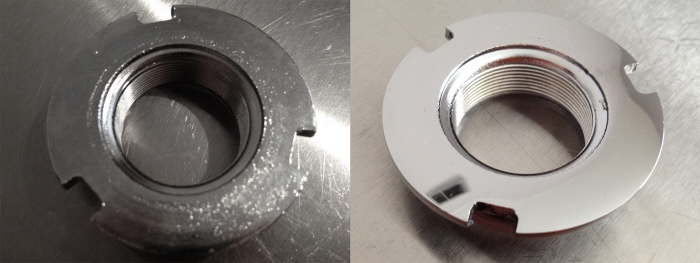
lower bracket hardware before/ after hand sanding/ mirror polishing
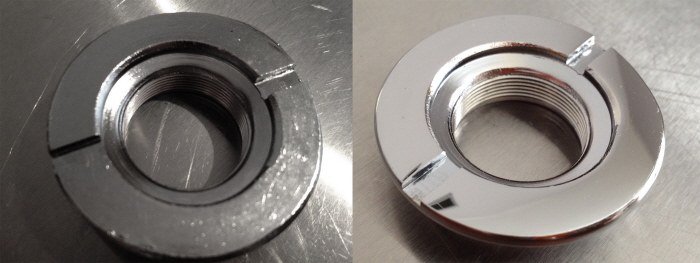
lower bracket hardware before/ after hand sanding/ mirror polishing
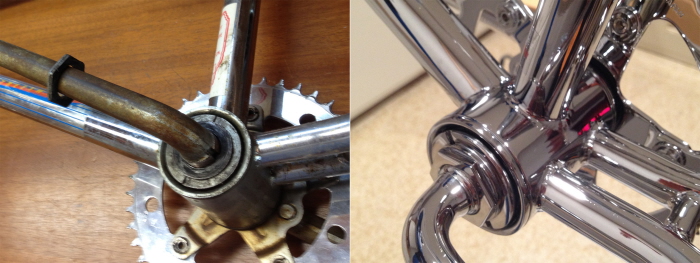
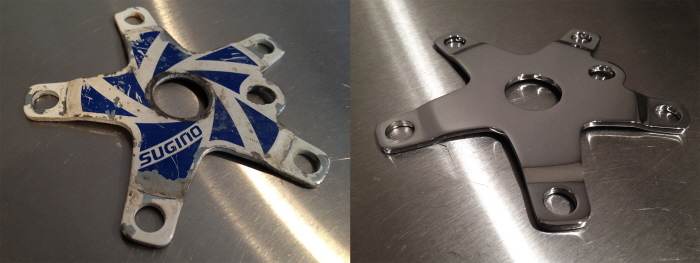
crank before/ after chrome. lower bracket hardware before after sanding/ mirror polishing
crank center. (chromer failed to chrome plate this area) before/ after wirewheel and polishing
front sprocket before/ after chrome plating
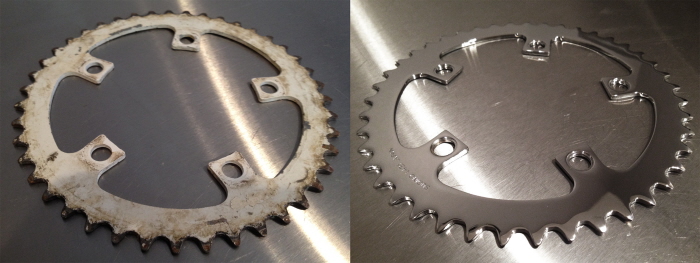
front sprocket chainring before/ after chrome plating
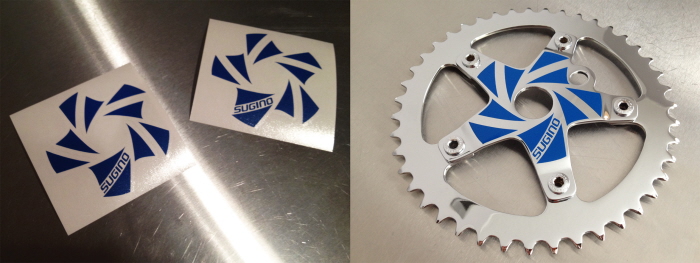
personally made crank graphics, and fully assembled crank with NOS Sugino chainring fasteners.
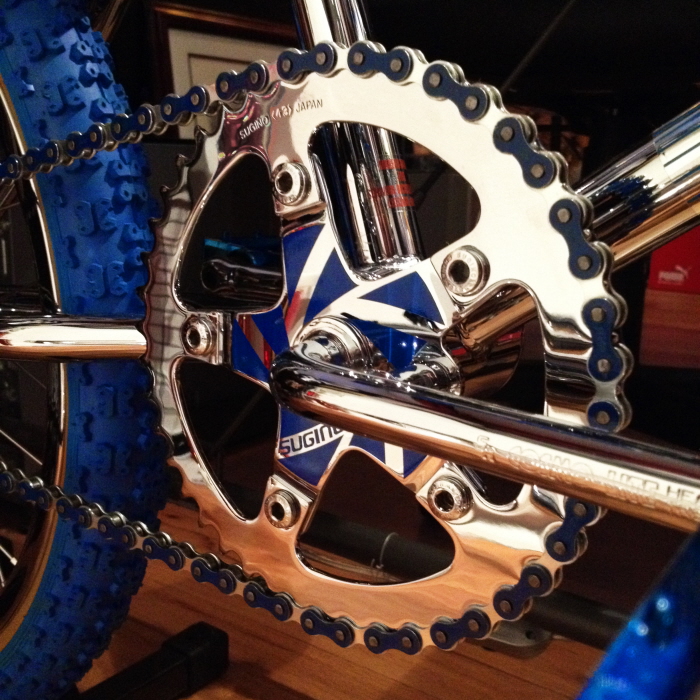
NOS 80s Izumi chain w/ hand polished links. It took me over a year to find a blue Izumi chain, that wasn't beaten. I actually located this one in the UK. Unfortunately a few links had been removed by the seller, so now I have to source a smaller chainring
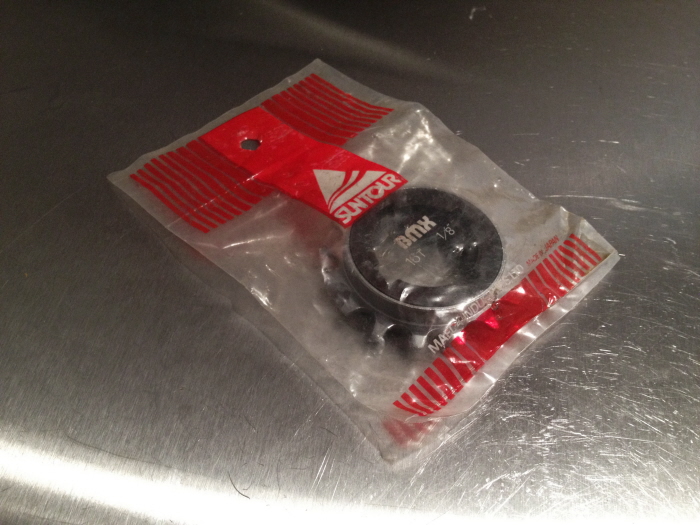
NOS 16T Suntour freewheel
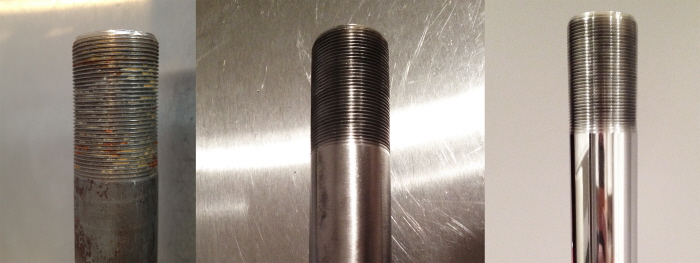
handlebars before/ after chrome plating
handlebars before/ after chrome
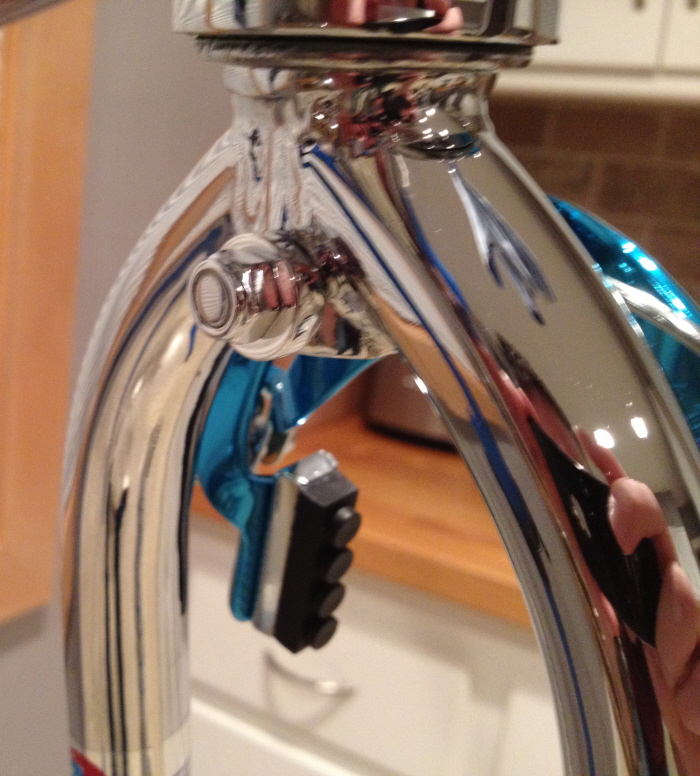
chromer failed to chrome plate the upper portion of the fork. before/ after wire wheel/ sanding/ polishing
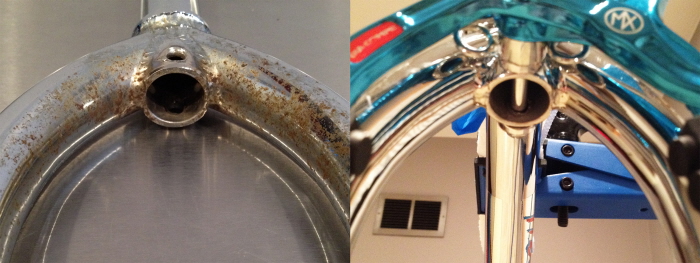
fork before/ after chrome plating
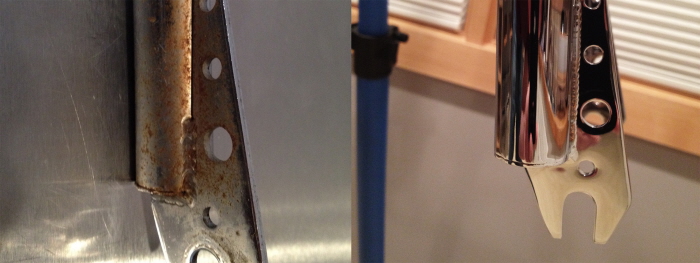
fork dropouts before/ after chrome plating
seat post before/ after chrome plating
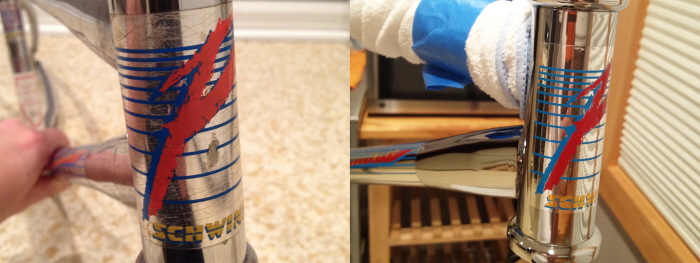
before/ after original decals/ reproductions
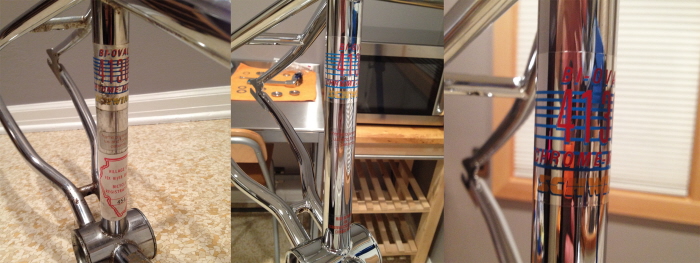
before/ after original decals/ reproductions
before/ after original decals/ reproductions

brake cable ends. before/ after hand sanding/ mirror polishing
brake caliper components/ hardware. before/ after hand sanding/ mirror polishing
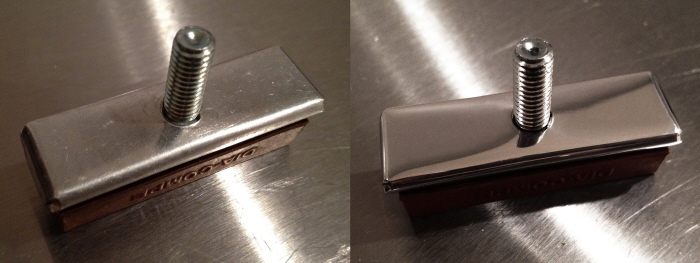
NOS Dia-Compe brake pads. sanded/ mirror polished
brake cable adjuster before/ after hand sanding/ mirror polishing. (please note the clear reflection of the faucet and paper towel holder )
flush cut/ sanded/ mirror polished fastener ends. For me, this can make or break the finish level of a project. Too often I see people over looking fasteners. Nothing shows your level of detail, or OCD, like flush cut fasteners and aligned nuts
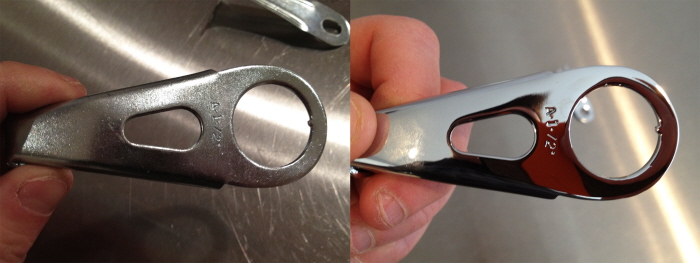
brake caliper mount. before/ after hand sanding/ mirror polishing (still some polishing compound in the threads)

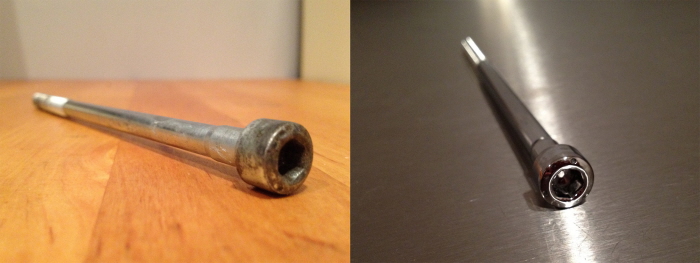
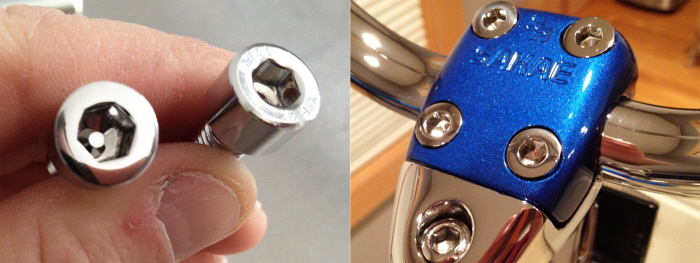
stem before/ after chrome plating. flush cut/ sanded/ mirror polished fastener ends (same as every fastener on the bike)
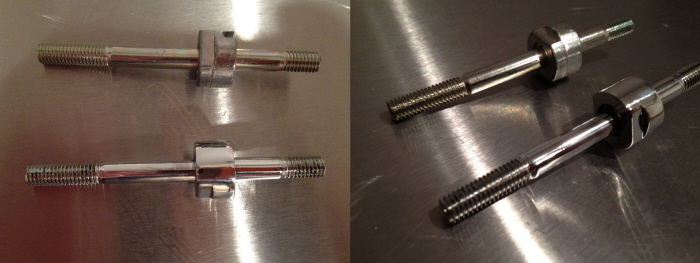
stem fastener before/ after hand sanding/ mirror polishing
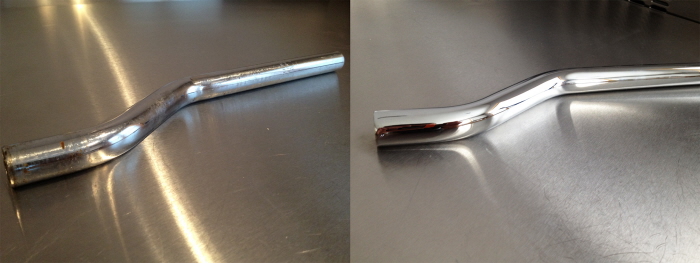
stem wedge before/ after wire brush/ painting
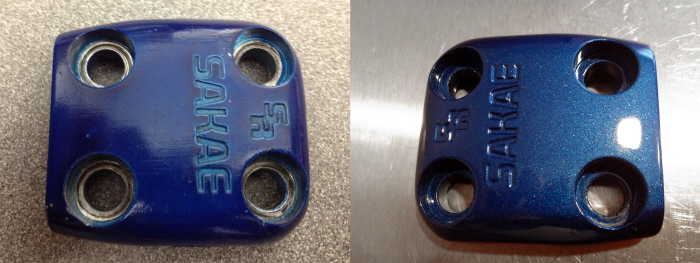
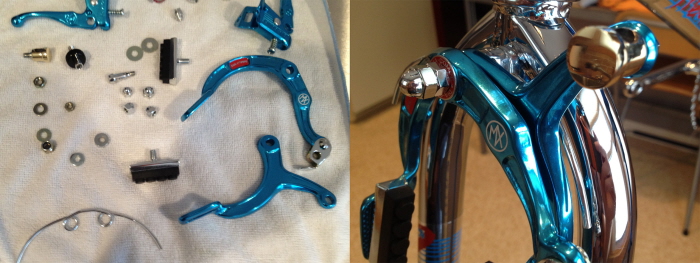
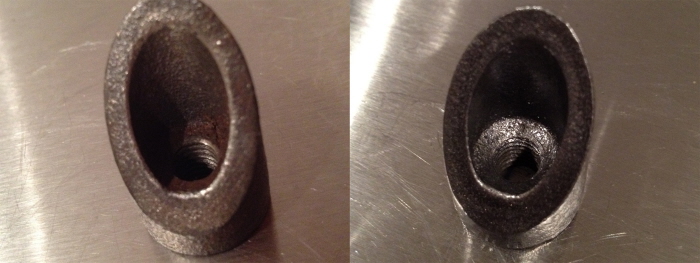
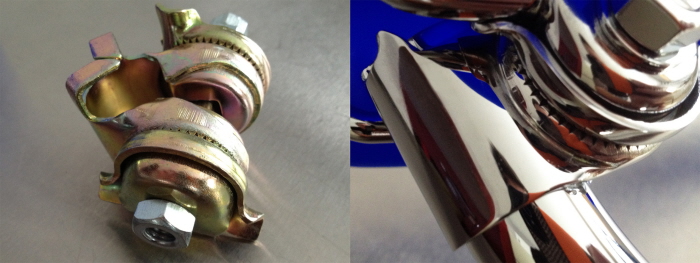
handlebar clamp. before/ after blasting/ 2 stage painting (base/clear)
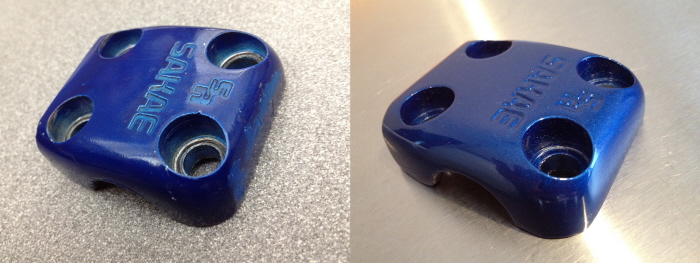
handlebar clamp. before/ after blasting/ 2 stage painting (base/clear)
clamp fasteners before/ after hand sanding/ mirror polishing. (all grade markings sanded out) fully assembled clamp
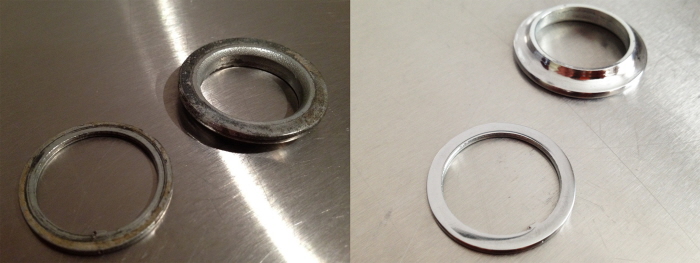
headset hardware before/ after hand sanding/ mirror polishing
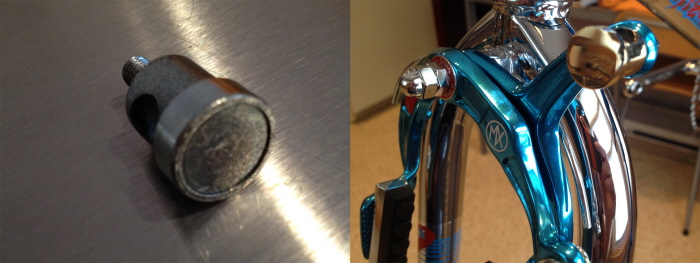
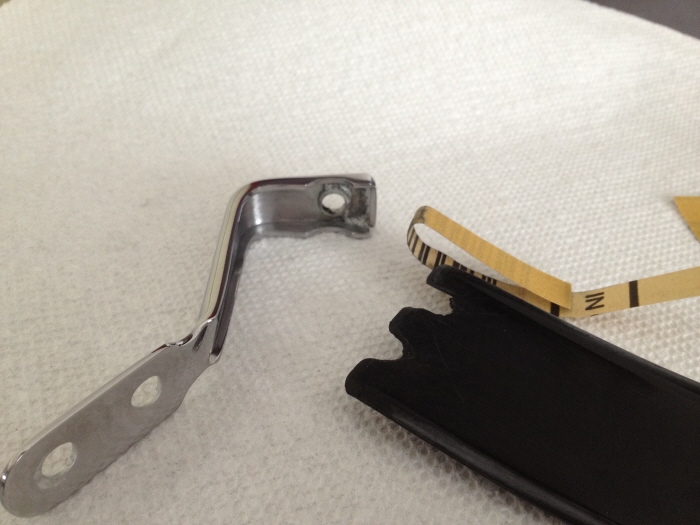
front reflector bracket before/ after chrome plating

rear reflector bracket before/ after hand sanding/ mirror polishing (all casting/ forming marks sanded out)
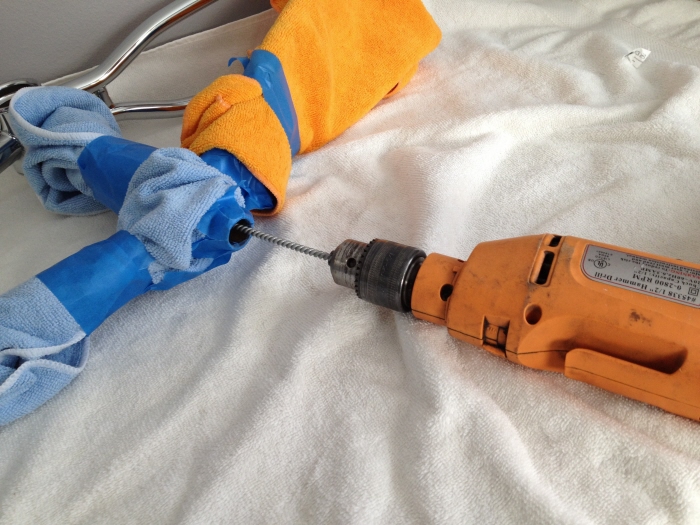
Foreman scraper(with "modified tooth") proved quite useful in sanding inner radius
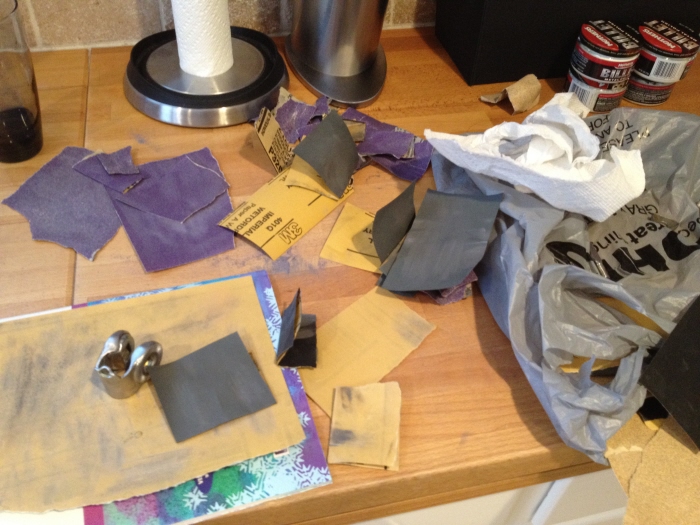
Bachelor advantage #347...using entire kitchen as restoration station (seat gut sanding shown)
cleaning out seat tube after chrome plating
seat guts before/ after grinding/ hand sanding/ mirror polishing (finished polished guts shown with old seat)
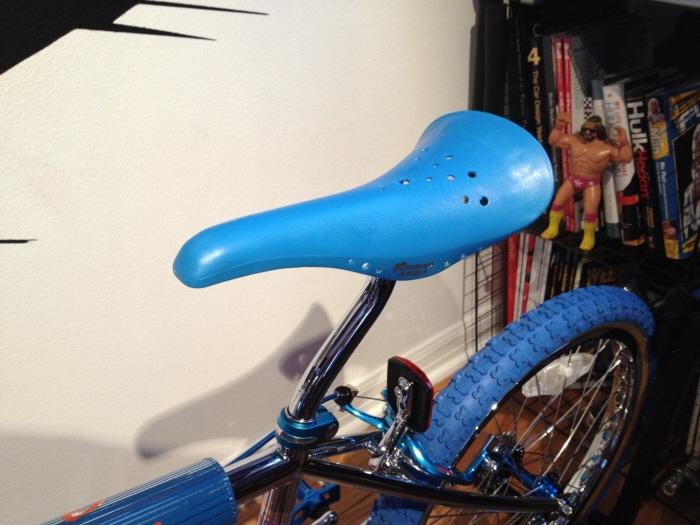
NOS Viscount Aero seat
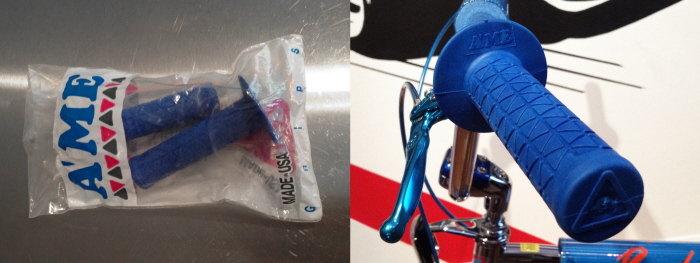
NOS AME bubble font grips
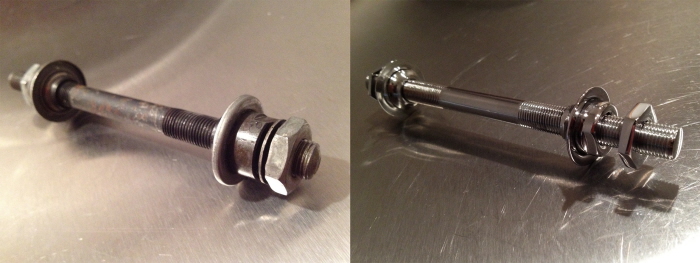
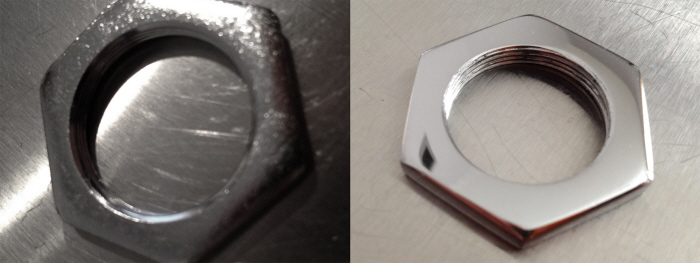
before/ after full hand sanding/ mirror polishing (axle/ bearing cones/ jam nuts)
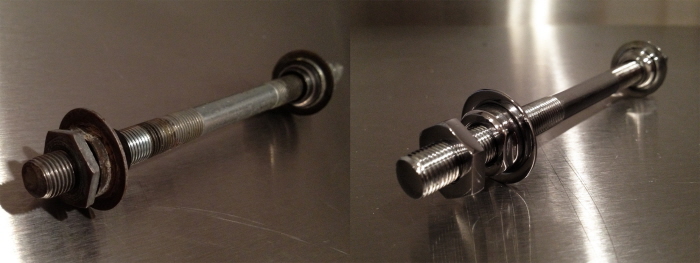
before/ after full hand sanding/ mirror polishing (axle/ bearing cones/ jam nuts)
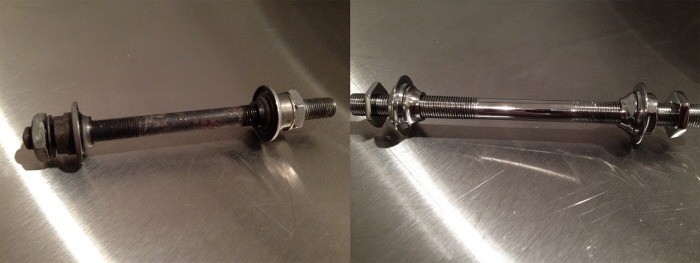
before/ after full hand sanding/ mirror polishing (axle/ bearing cones/ jam nuts)
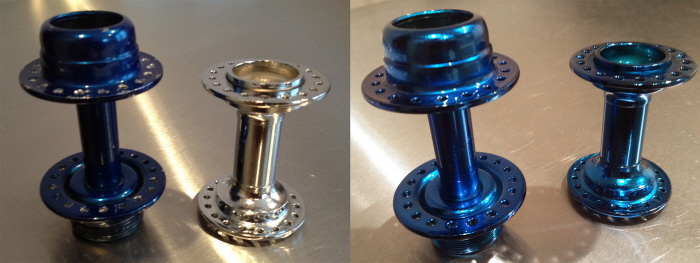
before/ after front & rear hubs. original candy coat stripped/ repainted candy blue
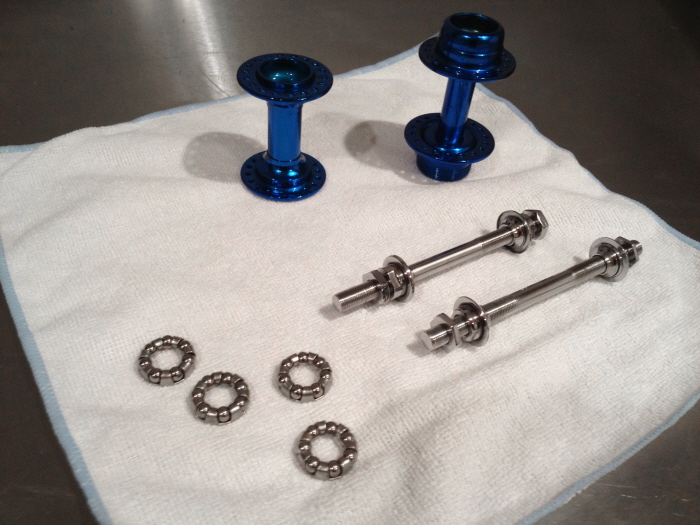
pre hub assembly
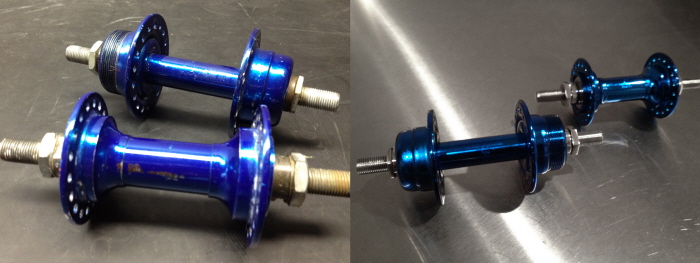
before/ after hub assembly
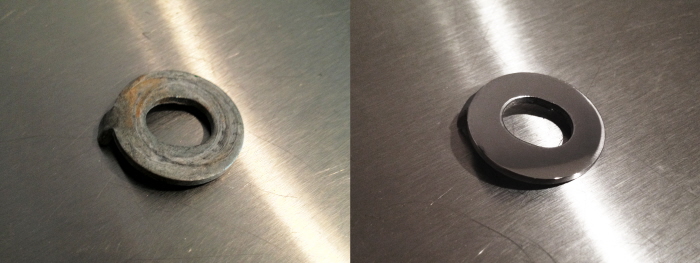
front axle washer before/ after hand sanding/ mirror polishing
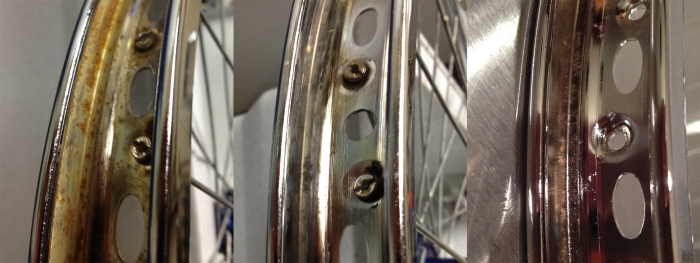
wheel rim before/ after rust removal/ chrome plating
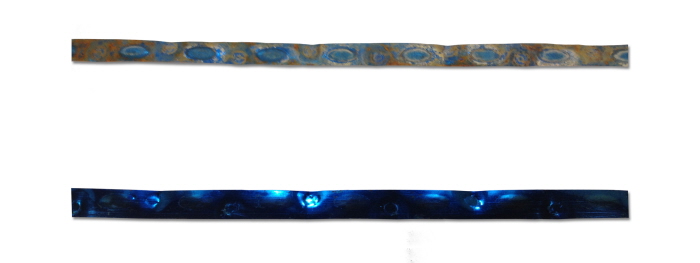
before/ after reflective blue wheel strip
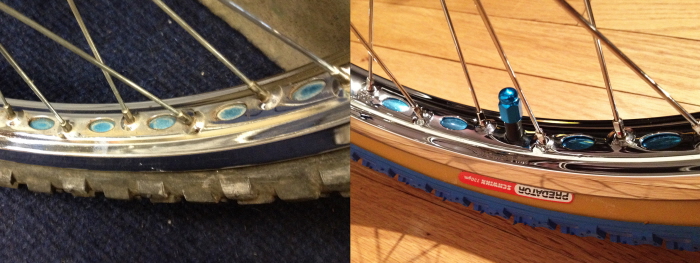
before/ after assembled wheel
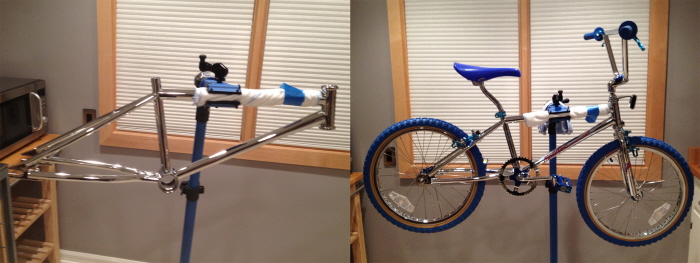
first/ last day on the stand
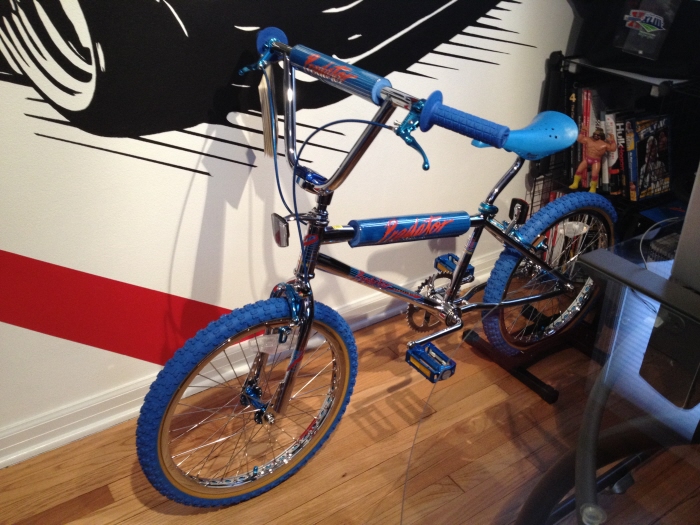
as it sits on display in the studio
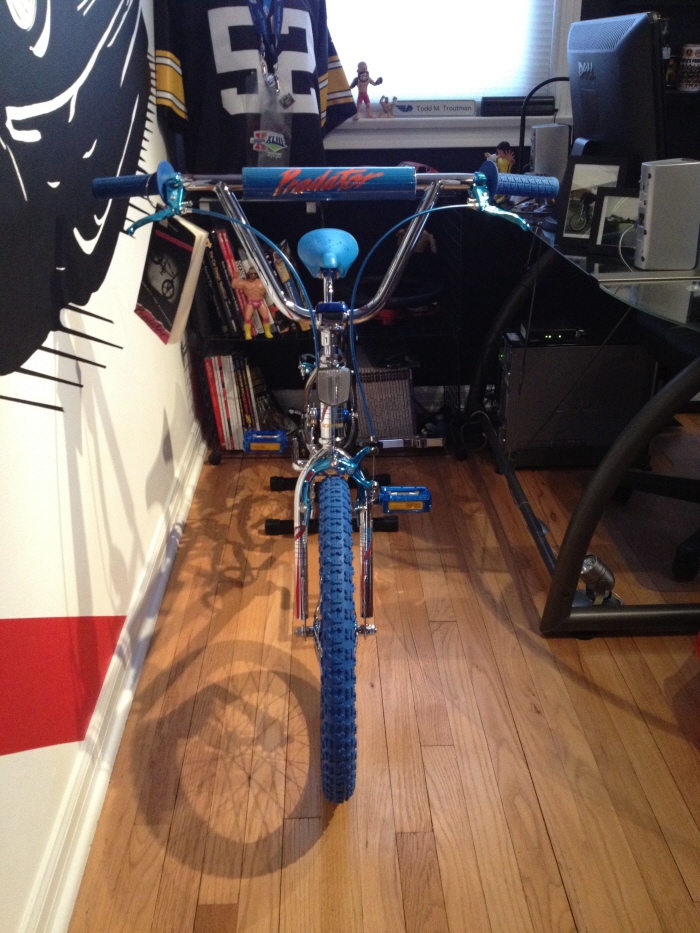
as it sits on display in the studio. These images are a little out-dated. Im currently trying to get a photoshoot done in Jan/Feb 2014
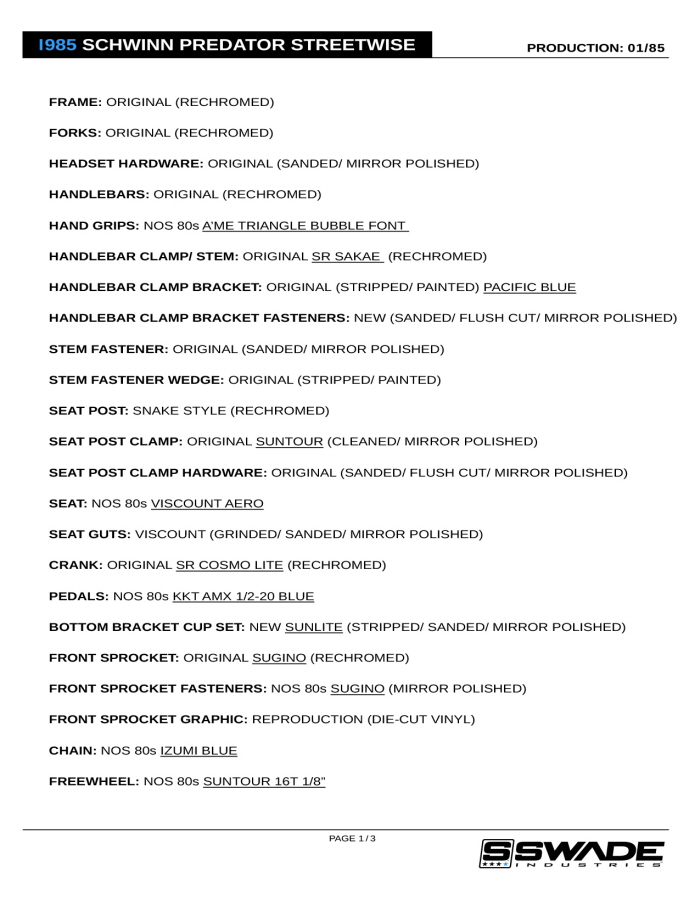
spec sheet 1
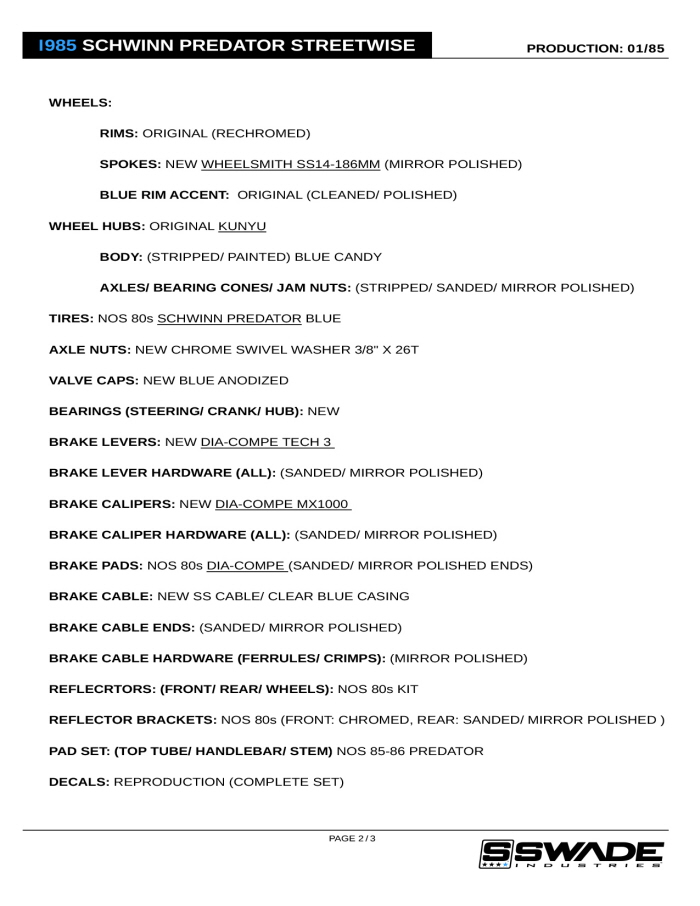
spec sheet 2
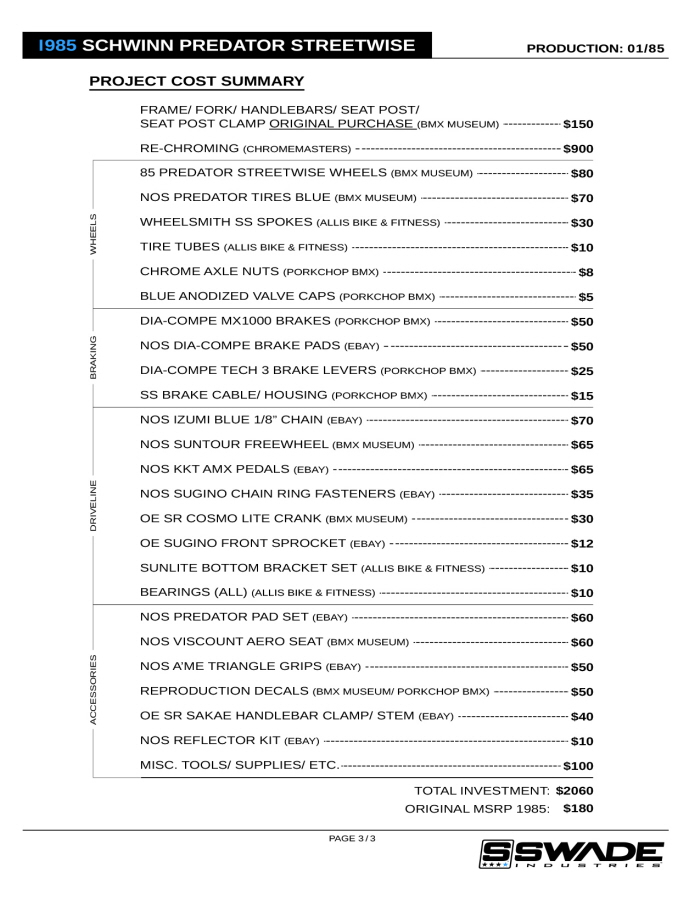
project costs
gLike
1985 Schwinn Predator Streetwise restoration
complete OE/show restoration of 1985 Schwinn Predator Streetwise. This was my first bike I had as a kid, and probably the main reason for my OCD and obsession to detail that I have today.
Total investment: $2000 and roughly 50+ hours of grinding, sanding, polishing, and assembly.
(hours sourcing parts unknown)