
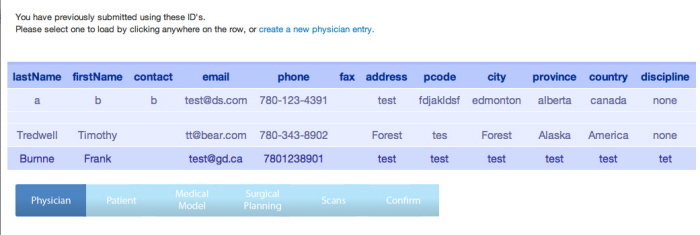
This page will only show up if the physician has already created a profile. By selecting an entry all of the data is preloaded into the application and does not need to be entered again.
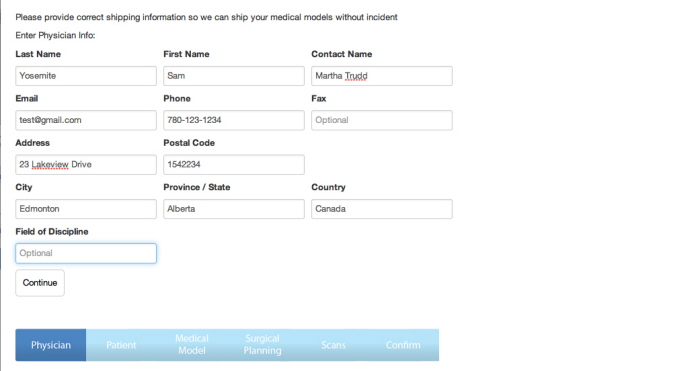
A new physician entry is created, if the physician already exists in the database this step can be skipped and have all of the data automatically loaded.
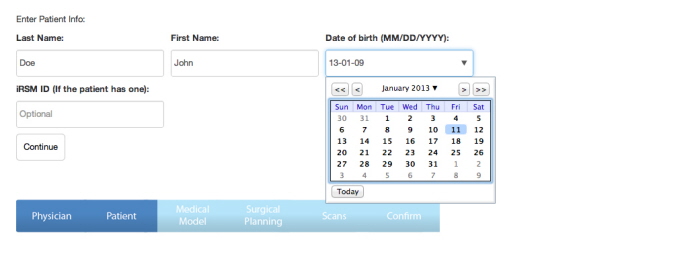
Relevant patient information is entered here.
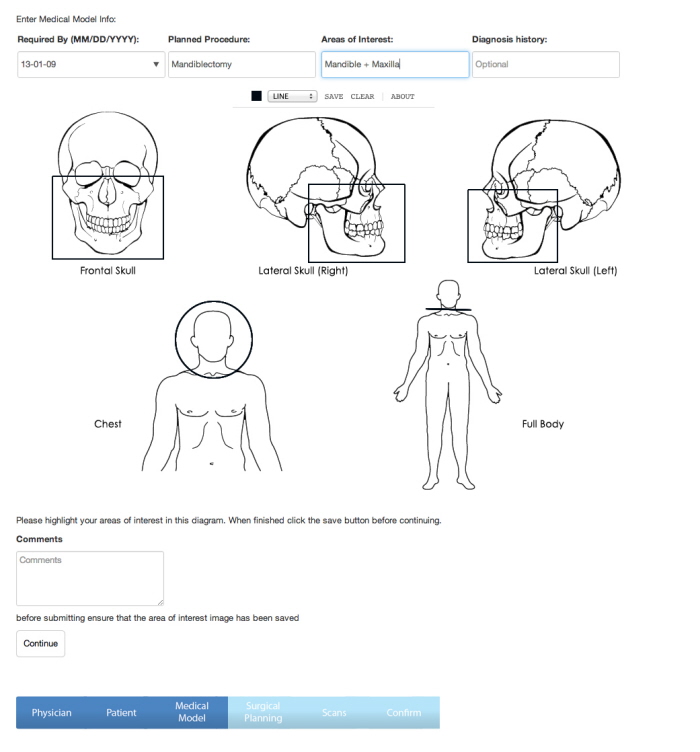
This page requests some basic data about the procedure to be performed on the patient. In the center of the page an html5 JavaScript drawing application (based off Mr.Doob's Harmony app) is used to draw squares, circles, lines, or free hand on the background template. The drawing application has been rigorously tested to function on the majority of web browsers, notably older versions of internet explorer and mobile browsers. Once the drawing is saved it is converted into a string that can later be turned into a .png and overlaid in the database back-end.
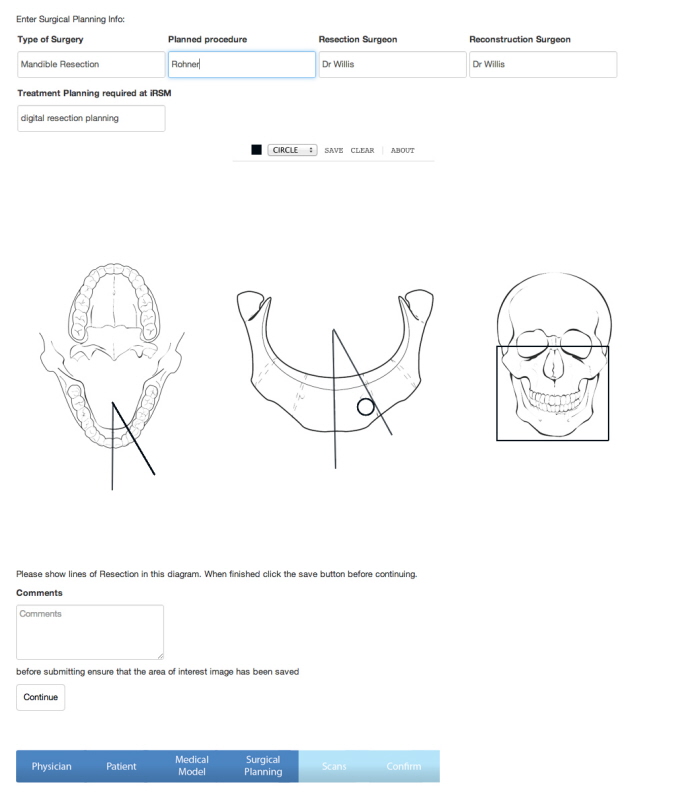
After entering data for the medical model, the user is prompted with a question asking whether they want digital surgical planning or not. If they select yes this page is displayed, no and the page is skipped. This page uses the same drawing application as previously but swaps out the background dynamically so a different drawing can be made. The background is not saved with the rest of the image and is instead dynamically loaded in as a background layer when displaying the images later.
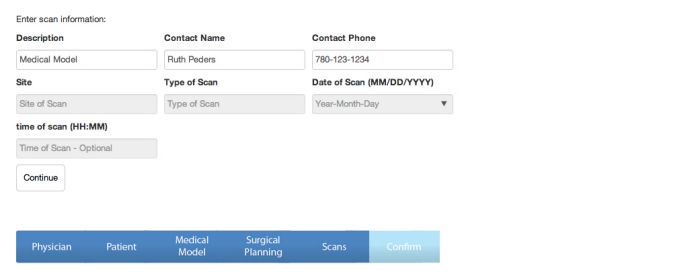
The user is prompted asking whether they would like to arrange the CT scans themselves or through iRSM. If they select iRSM then the fields they don't have to worry about are greyed out. After completing this step the user is asked if they would like to create another scan or continue to the next step
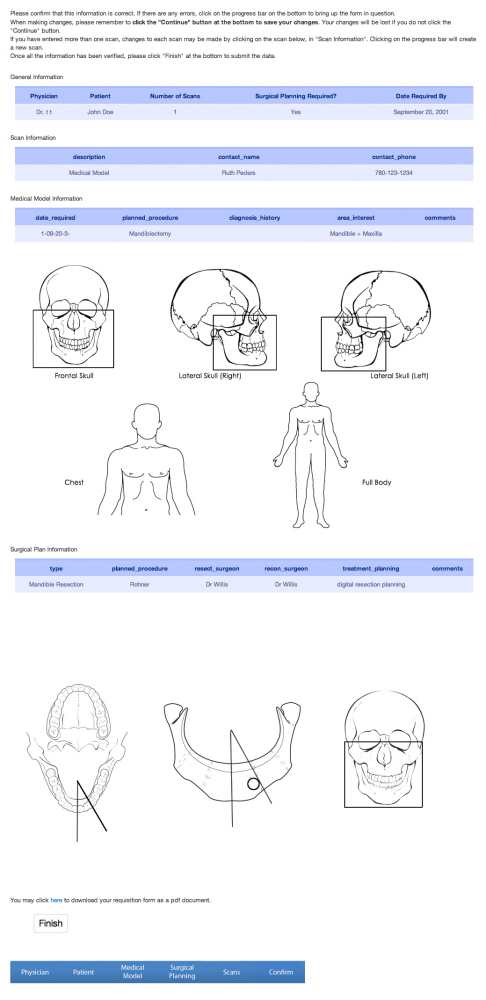
This is the last editable page of the form. Here it gives a summary of all the entered data and displays the drawings created. From here the user can go back to any page to make changes (as they can throughout the entire application), save a pdf of the summary, or finalize their input. Once the form is submitted all local variables are destroyed and all data is saved in an encrypted text file on the server.

After completing the form all the data and images acquired are saved as an encrypted text file locally on the hosting server. A script that is designed to perform certain actions at a set time interval is then run to populate the MySQL database with the information contained inside. The text file is then deleted and the information is only accessible by logging into the database back-end.
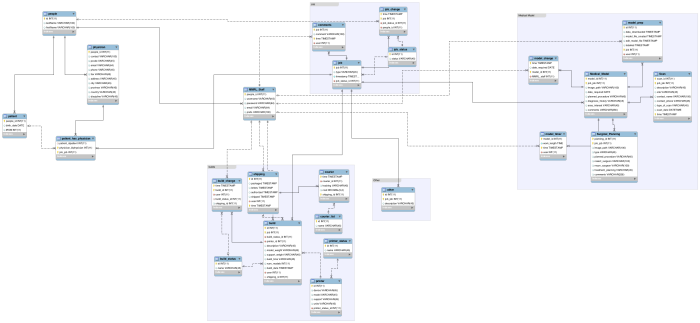
An overview of the MySQL database schema that determines how all of the data is stored and relates to other data.
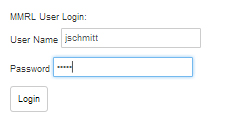
The login screen for the backend to the MySQL database. Accounts are managed through the database using encrypted passwords.
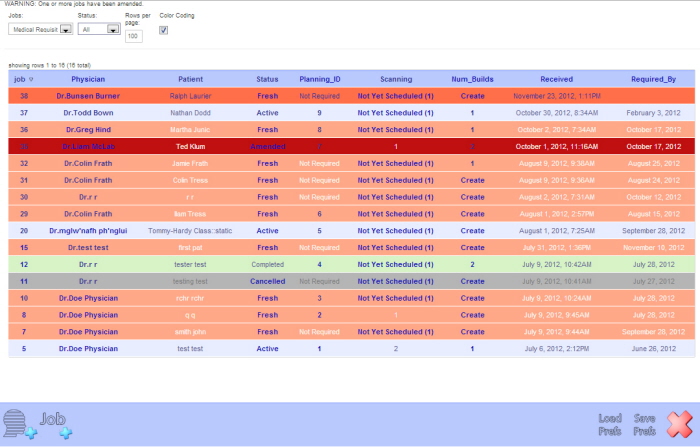
This is the main page of the back-end for the database. Here all the received jobs are displayed and can be ordered dynamically based on a number of different options. Jobs can be displayed based on their type, or current status. They can also be arranged chronologically by the date received, how many models were created and a variety of other options. The number of results displayed can also be changed by the user.
A job is selected by clicking its job number, once selected the application will load all of the data related to that specific job on the next page.
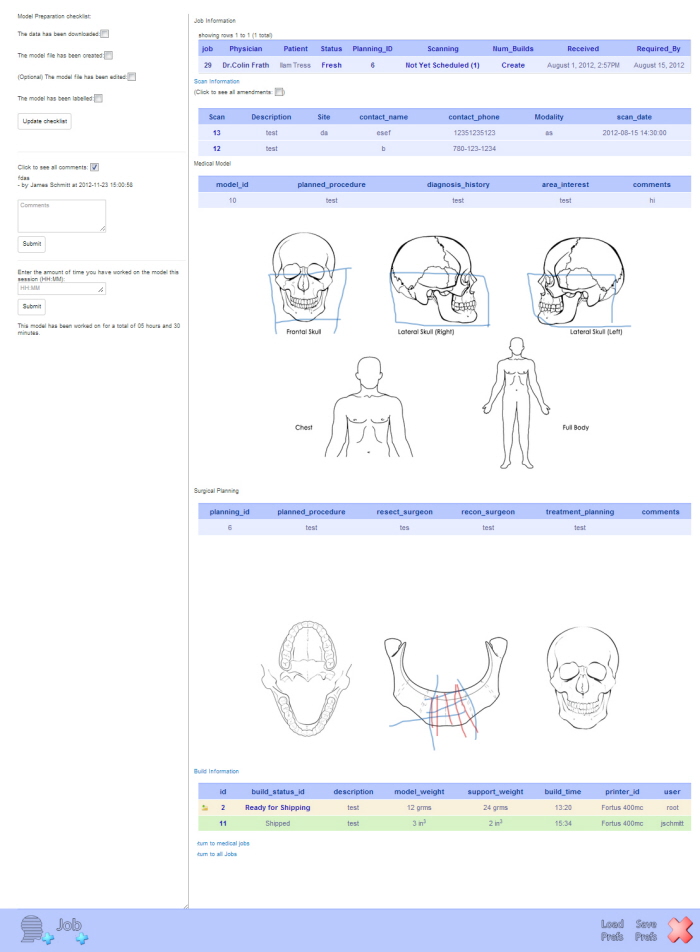
This is the job view of a selected job. Here it will display all of the information that was entered in the form as well as the drawings. Technical staff have checklists they can tick off as they complete steps in their process, as well as a time tracker, and comment section. At the bottom there is the option to create "builds" meaning 3D model builds for rapid prototyping. This system keeps track of how much material was used in each build and how long it took. Any number of builds can be added for each job. Once the build is completed it can then be shipped out. The status of individual builds, shipments, and jobs are maintained separately and are kept with a full record of all changes made with timestamps and user codes.
gLike
Medical Requisition System
This medical model requisition system provides an online form to allow data input that is then used to organize patient care. The back-end of the system allows technical staff to view all received requisitions as well as make modifications and track work that has been completed on a per job basis. How medical models are built are tracked along with when and how models are sent to the requesting parties. This project was created from scratch utilizing MySQL, PHP, and javascript. The database is hosted on a old desktop machine running Apache on an Ubuntu OS.