
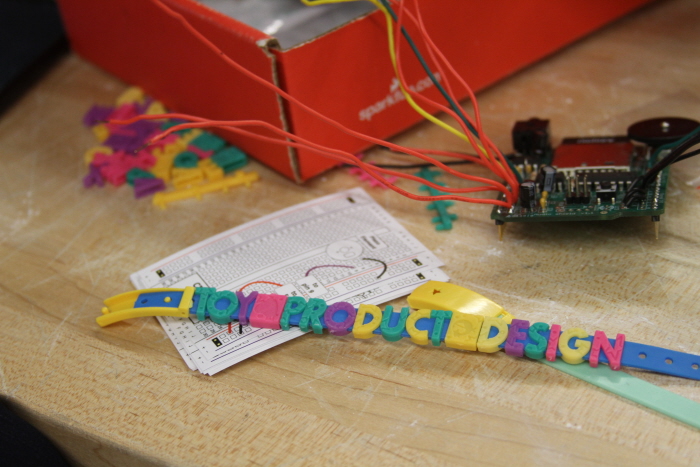
Bongo bands was a prototype created during Toy Product Design, a project- and team-based product design course offered at the University of Minnesota. The course follows the product design process all the way from initial brainstorming and benchmarking, and concludes with a final, alpha prototype presented at the "PLAYsentations" at the end of the semester.

The first step was to come up with as many ideas as we possibly could. We brainstormed on our own, as a team, did market research, more brainstorming, and narrowed it down to our 5 favorite ideas. From there, each member of the team took one of the ideas, developed it further, and pitched it at a poster presentation session.
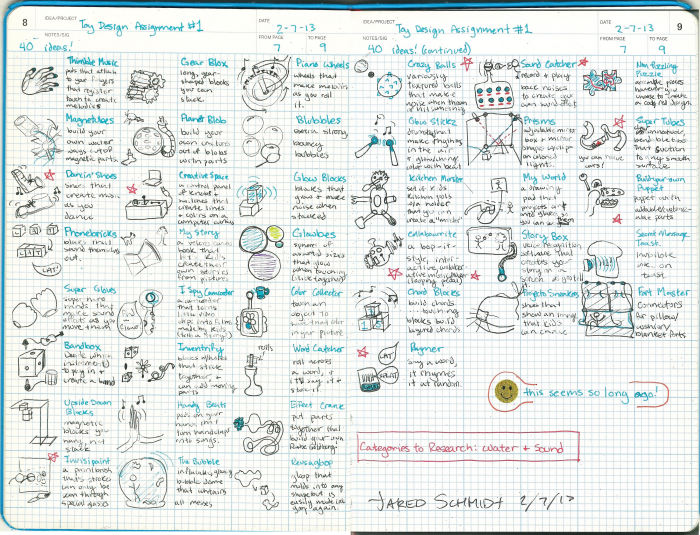
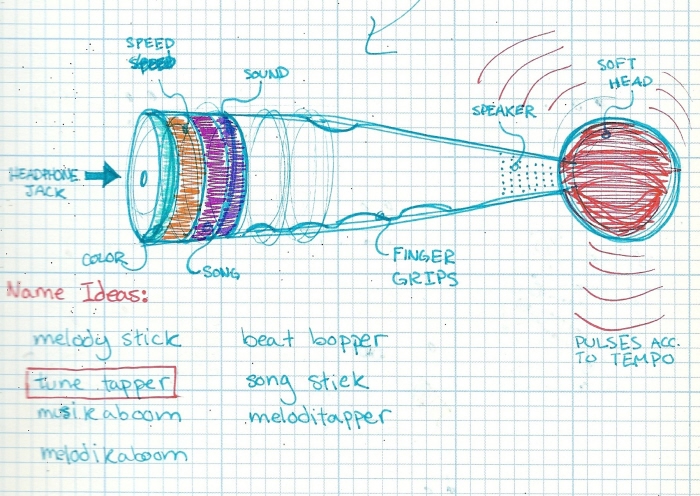
I eventually settled on an idea for musical drumsticks that play tones on impact, called Tune Tappers. The different tones are determined by the three dials on the end of the stick.

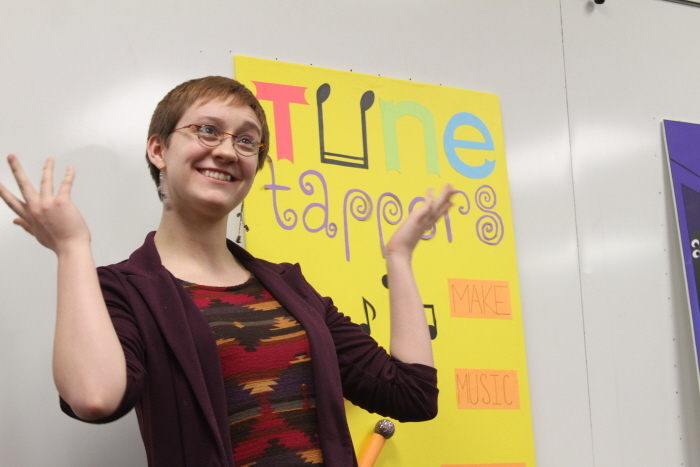
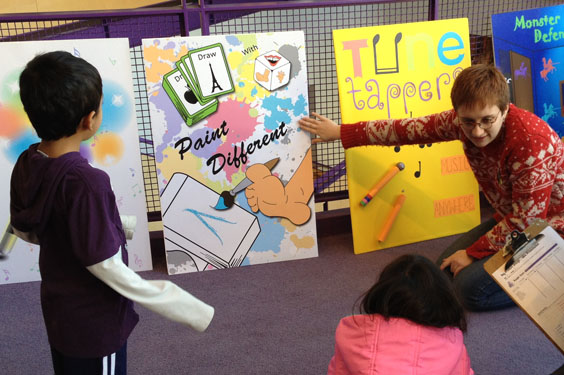
Once I came up with the idea for Tune Tappers, it was time to see what others thought of the idea. I gave an elevator pitch to an audience of fellow classmates and industry professionals, and also went to the Minnesota Children's Museum to get our target audience's perspective on the idea.

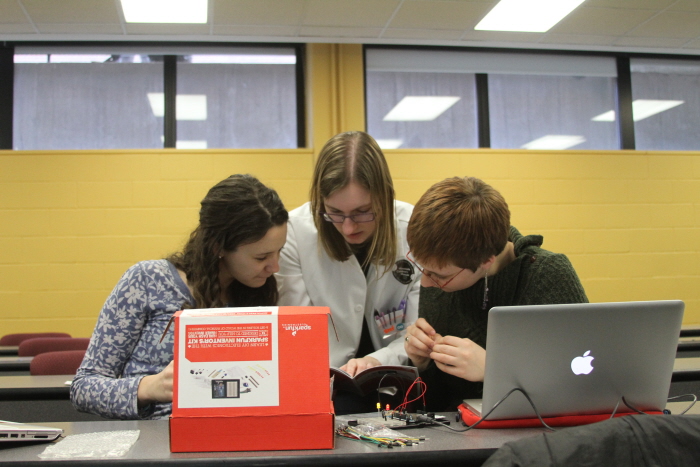
After analyzing the feedback from our other ideas, we decided to prototype Tune Tappers. Each member of the team took the idea in a different direction--from musical beads to a monster that "ate" (recorded) sounds. However, all of these ideas had an electronic component. To accomplish this, we learned how to use a small, printed circuit board called an Arduino. With easy-to-use hardware and software, Arduinos are designed to make electronic prototyping relatively simple. This was my first experience with electronics, however, so even with the advantages of Arduino, there was still a steep learning curve.

For my prototype, I chose to create Bongo Bands: hand straps that with buttons on the top and bottom of your palm. The idea was to be able to mimic playing the bongos on any surface.
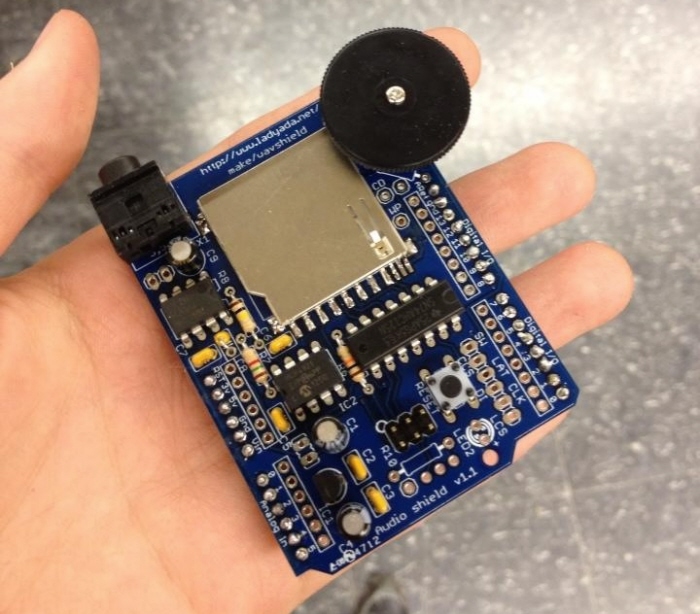
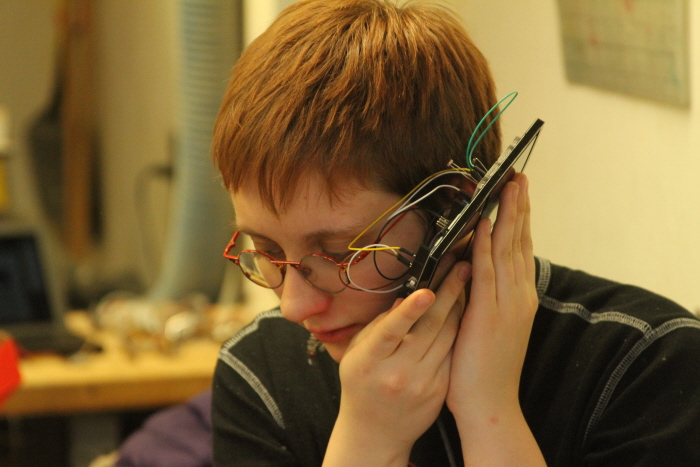
To make my Arduino play sound, I needed to add an extension to it called a Wav Shield, allowing the Arduino to read .wav files from an SD card. However, something I hadn't realized was that this Wav Shield came unassembled, so one of the first lessons I learned in making Bongo Bands was how to solder. I'd never used a soldering iron before, so 10 hours and over 250 solders later, I was extremely proud to have a working Arduino and Wav Shield!
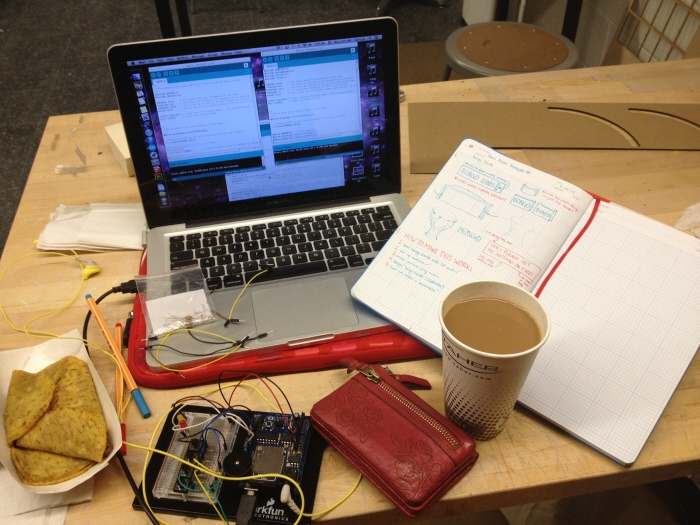
Learning to solder was definitely not the only all-nighter I pulled, however. I spent several nights at a bench in the University of Minnesota's design workshop, debugging code, writing notes, and drinking lots and lots of coffee.
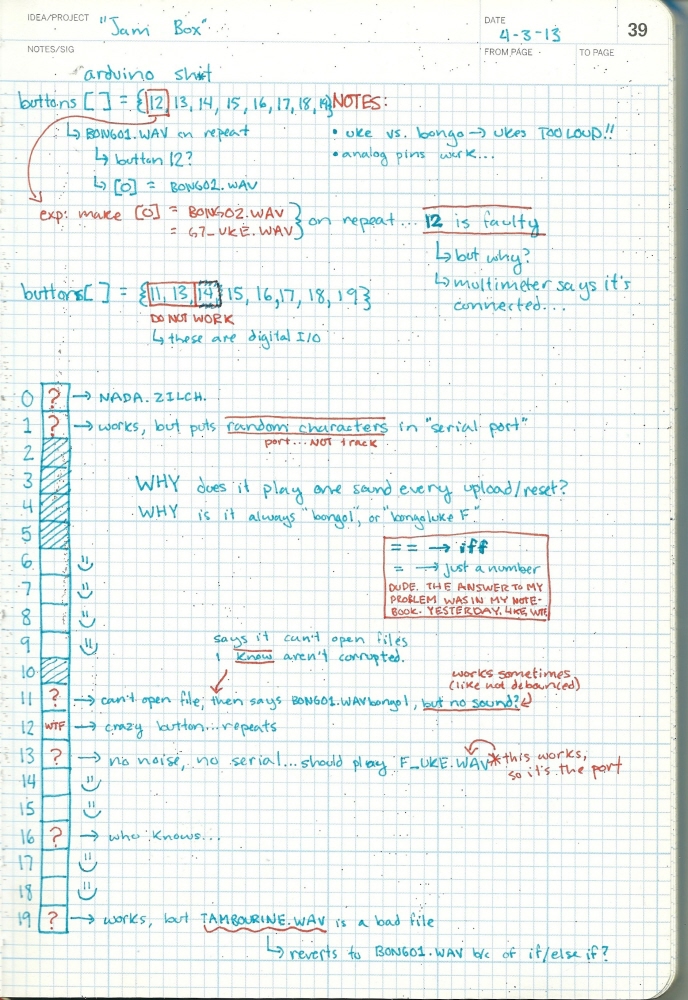
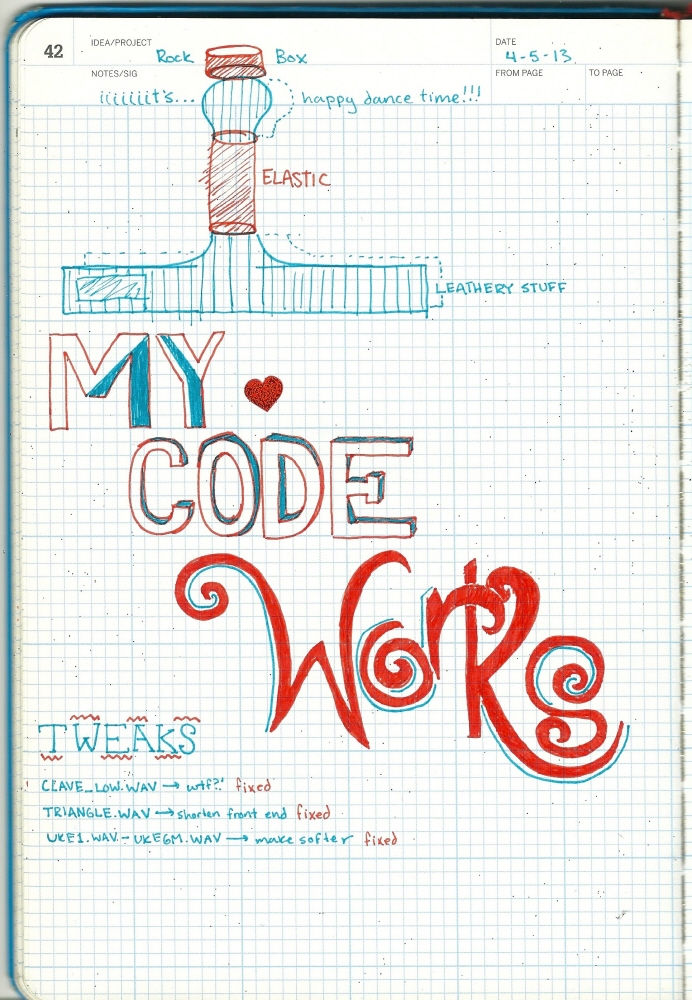
Finally, my code worked! I was able to press any of 4 buttons, and have each button play back a unique, bongo sound. While it doesn't sound like an overly difficult task, at the time, it was quite the accomplishment for me.

Once I had my code working, it was time to take my work off the bread board and transform my circuitry into a usable product.
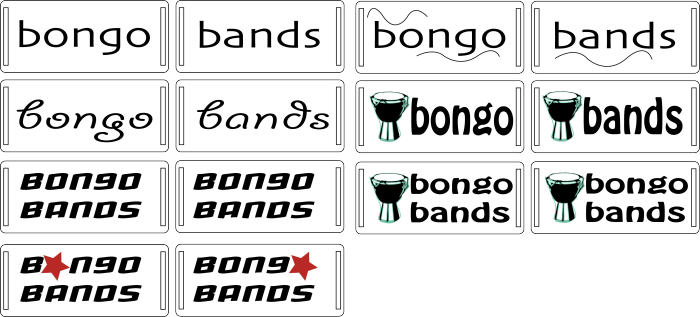
I learned how to use Adobe Illustrator, and experimented with different logos for my product. I ended up choosing the last design in the right column (above), cut it out of MDF (an engineered, wood substrate), and threaded elastic through the holes on either side. This became the wrist strap that users could put on to try the Bongo Bands.
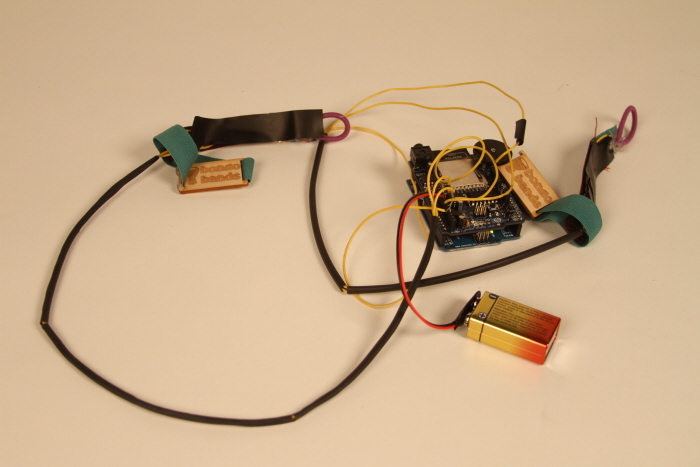
The working prototype was far from beautiful, but it was functional. I soldered all of the circuitry into a wearable band, and covered the exposed wiring with electrical tape. Then, using heat-shrink tubing, I consolidated and insulated the many wires running between the bands and the Arduino. Finally, I learned how to load my code onto the Arduino so it could be powered by a battery instead of my computer. The finished result was a working, portable, electronic toy that was unlike anything I'd ever done before.

During a second review session, I presented my prototype to more industry professionals and students, and also made a repeat visit to the Minnesota Children's Museum for even more feedback. We then collected all of the critiques, analyzed them, and based on that feedback, decided to move forward with the Bongo Bands of idea. Now called Beat Bands to allow for a wider variety of sounds, our more advanced prototype had more ergonomic wrist straps and a "sound set" button that allowed users to switch between different types of sounds such as bongos, electric guitar chords, and animal noises.
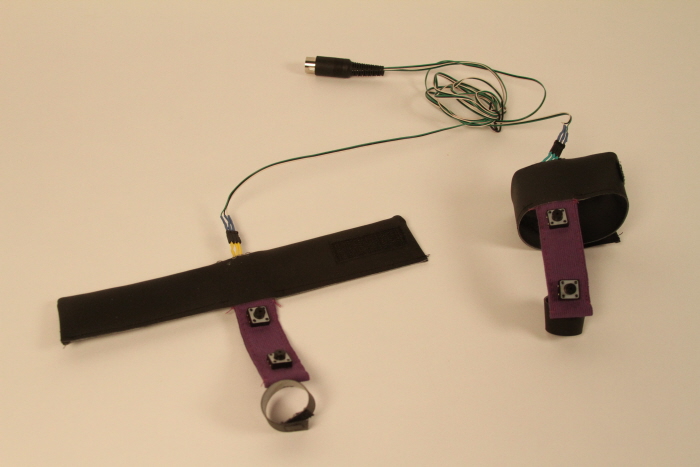
We redesigned the bands to be more ergonomic. In the original prototype, I hid the wiring between a cut-up headband and electrical tape. This worked for proof-of-concept, but this prototype featured a hand-sewn band that housed the wiring, and removable cords so the prototype was easier to carry and less likely to get damaged in transit.
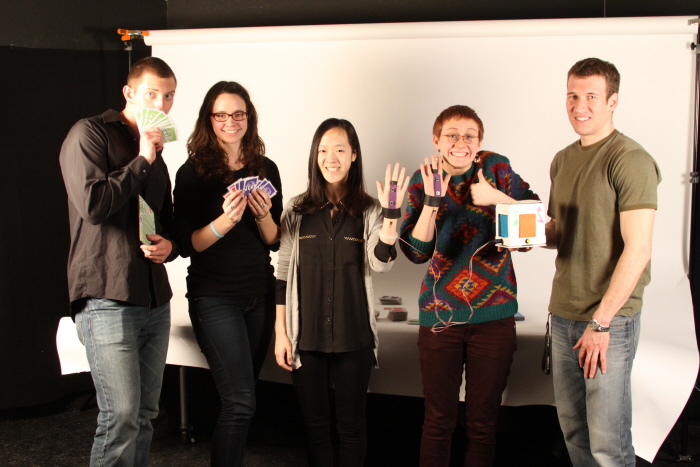
We created two advanced, working prototypes to be reviewed by dozens of children, students, and product designers working in industry. Above is a picture of our team with Bongo Bands, and our other prototype, an improvisation-based card game called "Here's the Catch". We were really happy with how they both turned out, but ultimately, we decided to go with "Here's the Catch" in our final round of prototyping for the class.
gLike
Bongo Bands