
Final Radio Design - Front Labelled (2008) - My Final Year Major Project at University was a radio for people in the UK aged fifty and over. Its standout features are its simple button layout, large screen, easy to use interface with onscreen instructions and portable Satellite Speakers.
Only functions requiring immediate access to settings were given dedicated controls. The screen and menu dial replace the majority of the buttons so functions are easy to navigate to if needed.

Final Radio Design - Base Labelled (2008) - The underside of the Orbit Radio.
Images of the appearance model I made and my sketch work can be found in the 'Illustrations and Miscellaneous' and 'Sketches' folders.

Final Radio Design - Back Labelled (2008) - The back of The Orbit Radio.
Images of the appearance model I made and my sketch work can be found in the 'Illustrations and Miscellaneous' and 'Sketches' folders.

Final Radio Design - Top Labelled (2008) - The top of the Orbit Radio.
Images of the appearance model I made and my sketch work can be found in the 'Illustrations and Miscellaneous' and 'Sketches' folders.

Final Radio Design - Satellite Speakers Labelled (2008) - The detachable satellite speakers are easily removed and re-attached to the main unit using built-in shielded magnets. When disconnected, they continue to play the selected radio station for a distance of 30 metres. Battery life for the satellites is enough for a day's listening. Their batteries charge through the mains whenever they are connected to the main unit. They include capacitive sensors for volume and off controls, enabling them to be adjusted by sliding a finger over the casing.

Orbit Radio Solid Aluminium Appearance Model (2008) - This was the Model I made of my final year project. The model was made of solid aluminium and perspex. Descriptions, labelled drawings and sketches can be found in the 'Product' and 'Sketches' folders.

Major Project DAB Radio Solid Aluminium Appearance Model Photographs In Use (2008) - More Photos of the model I made of the final design of my radio project. The photos show the radio operating with a single speaker and a Satellite Speaker being used as an iPod speaker.
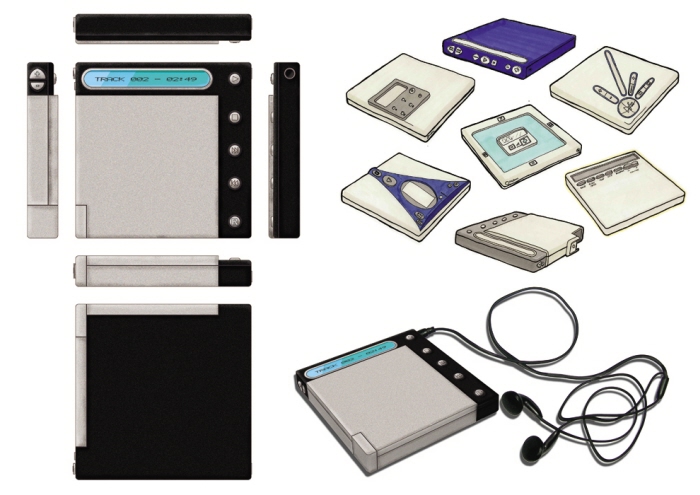
Mp3 Player (2004) - A detailing exercise. The size and shape of the mp3 player, as well as the number of buttons were predetermined. The final design was drwan using Graphite and rendered in Photoshop. The 3D model was also created using Photoshop.
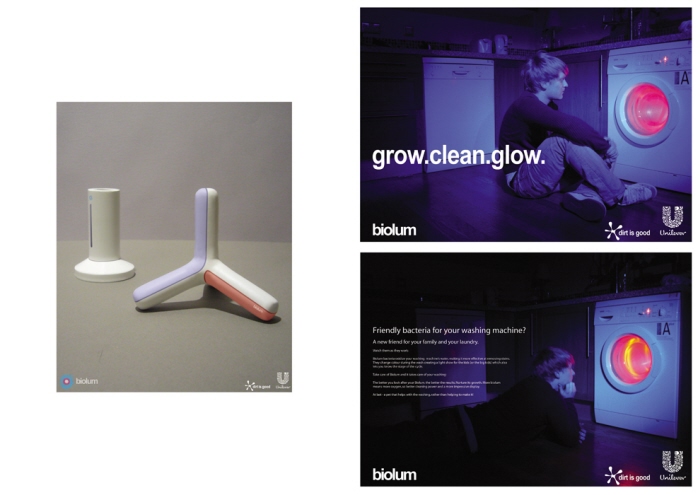
Biolum Adverts (2007) - This was a group exercise working with Unilever. In trying to find ways to make washing more enjoyable, we came up with a 'pet', called Biolum. Biolum helped with your washing by oxidising the water, and glowed different colours to let you know what stage your washing was in.
The images show the Biolum Product as well as adverts with the Biolum in action.
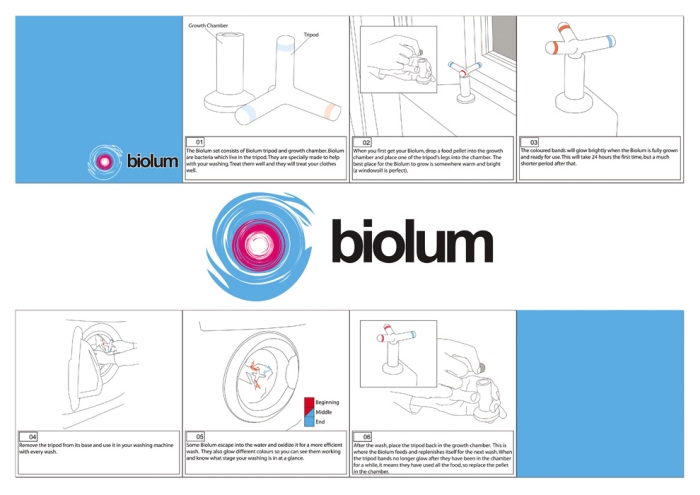
Biolum Care Book (2007) - Instructions on how to look after your new pet. Each square is a page from a care book that comes wrapped around the Biolum product.
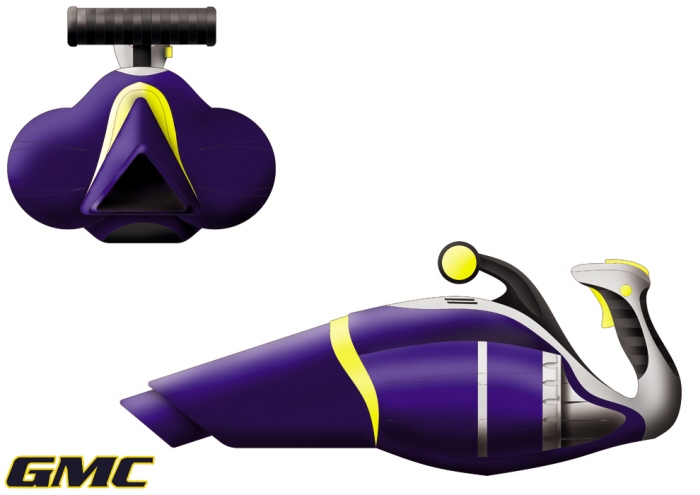
Jetvac front and side views (2006) - My partner and I were designing a hand-held vacuum cleaner for GMC. We aimed ours at the male market so made it look like a power tool crossed with a spaceship!
The image is Graphite line work rendered in Photoshop.
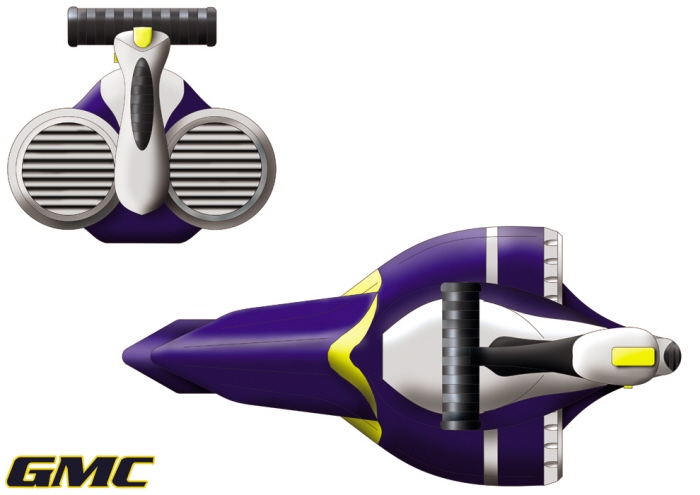
Jetvac back and top views (2006) - More views of the Jetvac hand-held vacuum cleaner. Images of the model and sketch work can be seen in the 'Illustration and Miscellaneous' and 'Sketches' folders.

Jetvac Render and Model Comparison (2006) - The gray model is full-scale and was made by my partner for this project and myself in a day and a half.

Jetvac Model Views (2006) - Different views of the full-size uriel Jetvac model.

Custom Rescue Racers Instructions (2007) - The Custom Rescue Racers toy line lets children create their own cars by taking different parts and making something new. These instructions were made to look like instructions from other childrens toys, such as Transformers. They were made using Illustrator.

Custom Rescue Racers In Action (2007) - The above images are photos of a child playing with the Rescue Racers prototype I built.
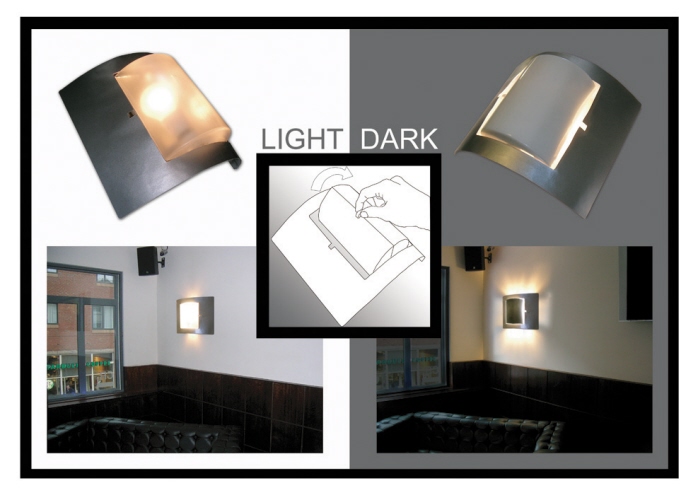
Wall Luminaire (2006) - The idea behind this light was one that enhanced the mood of the situation it was in. I intended for this luminaire to be found in quality bars and restaurants. The idea is that when it gets to night time and a different atmosphere is required, the bulb can be turned to shine onto the wall instead of out into the room, which makes the room darker, enhancing the mood and leaving an interesting effect on the wall.
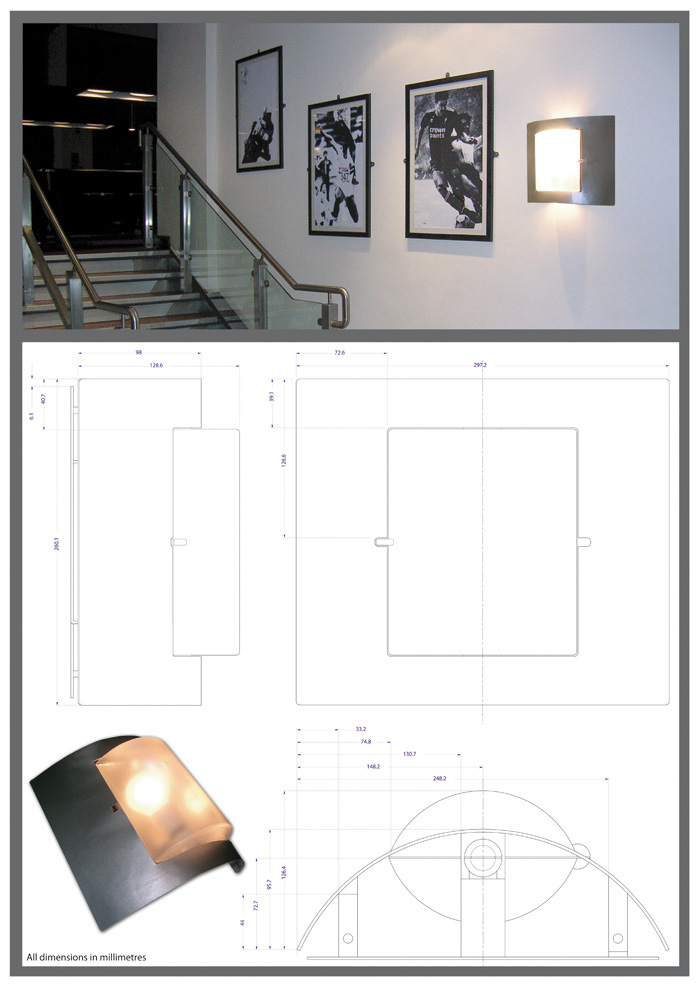
Wall Luminaire measurements (2006) - An appearance model of the luminaire was made and then added to the scene using Photoshop. Below the photograph is a working drawing.

Ceramic Jewellery With Hidden Features - Introduction (2007) - When researching properties of ceramics it became evident that some were almost transparent when a light shone through them. I designed jewellery that incorporated secret messages and photos, in the hope that they might become used as a modern take on charm bracelets.

Ceramic Jewellery With Hidden Features - Explanation (2007) - Please view the original file to read a short explanation (the text and background colours worked better together in print!). The centre image shows my original idea for the brief, which was mixing traditional chinese pottery designs with contemporary uses for ceramics such as watches.

Ceramic Jewellery With Hidden Features - Scenario (2007) - To give my idea the human element that I was aiming for, I created this storyboard.

Ceramic Jewellery With Hidden Features - Prototypes And Advert (2007) - Above is an idea for one way that the ceramic links might work and an advert for the watches.

2-Day Mouse Design Project (2006) - This project was to develop our skills at rendering sketches in Photoshop. We had two days to come up with a realistic mouse design (one that people would know how to use - no blue sky thinking) and render it in Photoshop. The smaller mice are other favourite designs which were marker rendered. More of these can be found in the 'Sketches' folder.

First Radio Design - Different Views (2008) - Much time was spent developing the DAB radio and finding out what my target market really wanted. This is a Graphite drawing of its first form. Although it did what people said they wanted, there was still a lot of work to be done.

First Radio Design - Angled Views (2008) - A view of my first design from a more 3D perspective. This was sent to my collaborators to help them visualise my design.

First Radio Design - Top And Front Coloured Views (2008) - A rendered image to highlight the finger grooves designed to ease the separation of the speakers from the main unit and to show the separator groove on the top. This was designed to help organise the controls into groups in the hope that users would not have to look at the radio to use the controls after having it for a short period of time.

First Radio Design - Labelled Front View (2008) - Originally a 1:1 scale drawing of the front of my first radio design. Part of a booklet for collaborators and potential users to comment on and suggest changes.

First Radio Design - Labelled Top View (2008) - Part of a booklet explaining the features of the top control panel in more detail.

Near Final Radio Design - Protective Speaker Casing Extended (2008) - The main unit's design was very nearly complete a long time before the deadline so extra time could be spent designing the detachable speakers. The speakers chosen in this design were thin film which meant they were very fragile. It also meant they could be rolled up very easily so they were compact and protected by the speaker casing if carried anywhere.

Near Final Radio Design - Protective Speaker Casing Closed (2008) - The fully compact version of the thin film speakers.

Near Final Radio Design - Curved Speakers (2008) - The thin film speakers were used again for this design, however issues with their fragility and not enough information on how hey worked meant that they were rejected even though people liked the shape. I opted for NXT speakers which I had thoroughly researched and knew would provide excellent sound quality. A combination of this design and a design that users would recognise more easily as speakers was created for the final design.

Near Final Radio Design - Conventional Speaker Casing (2008) - A more conventional design which was the basis for the final design. In this case the thin film speakers were protected by a grille like conventional speakers. This meant that people would know they were speakers but it also took away from using the thin film, as it was concealed- another reason for not using it.
gLike
Product Design